Быстрый старт
1. Product Introduction
1.1 Overview of SmartControl PRO Core Features and Advantages
CloudLink SmartControl PRO provides high-definition, low-latency, and end-to-end secure hardware-level remote maintenance capabilities. It features plug-and-play functionality, comprehensive toolsets, global network optimization, and compliance control. It is designed for industrial, medical, data center, and cross-border remote collaboration scenarios.
1.2 Packing List and Hardware Overview
Packing List
Device x1, HDMI Cable x1, Type-C to USB Cable x1, User Manual QR Code, Power Adapter x1, Antennas x4
1.2.1 Front Panel Interfaces and Buttons
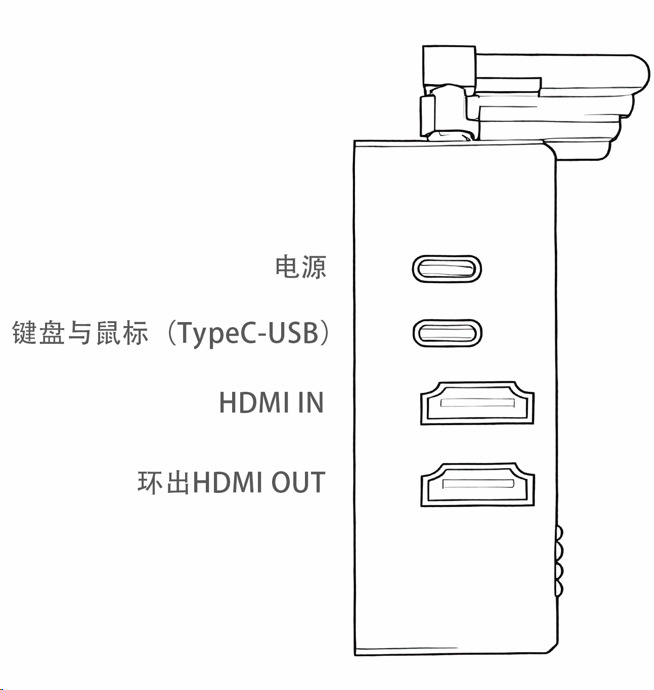
① DC12V: Power interface ② K/M: Connects to the target host's USB port (Keyboard/Mouse) ③ IN: Connects to the target host's HDMI port ④ LOOP: HDMI loop-out interface, used to output the target device's HDMI input signal to a local monitor synchronously
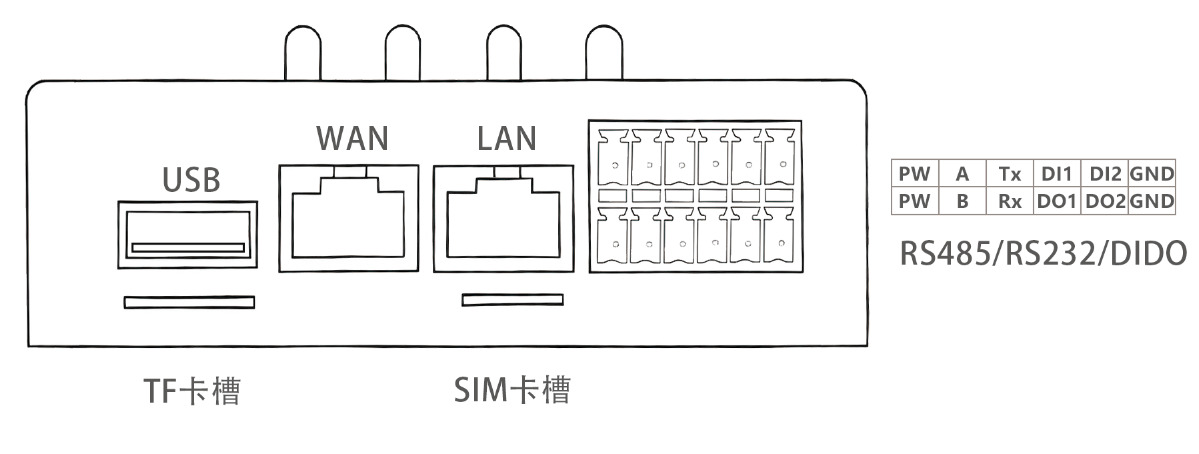
⑤ USB: Connects external devices such as USB flash drives ⑥ TF: TF (MicroSD) card expansion slot ⑦ WAN: Wired network interface for SmartControl PRO to connect to the external network (Internet) ⑧ LAN: Used to connect internal network devices to the Internet via SmartControl PRO ⑨ SIM: Slot for 4G cellular network connectivity ⑩ I/O: RS485 data acquisition interface
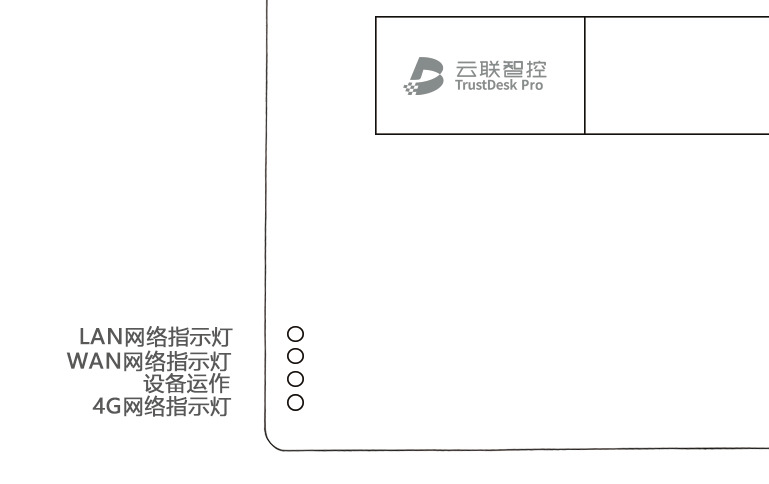
1.2.2 Rear Panel Interfaces and Network Ports
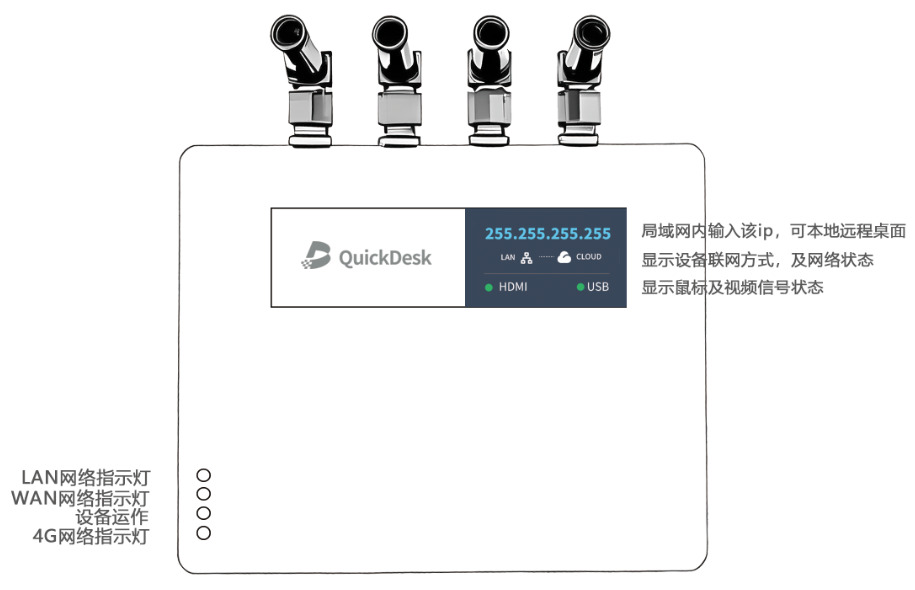
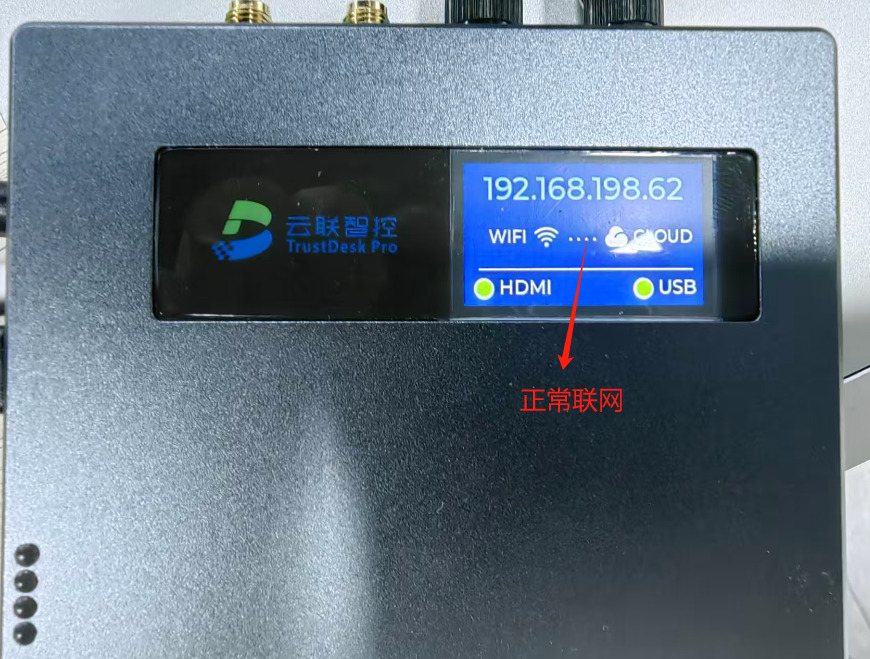
1.2.3 OLED Display Overview

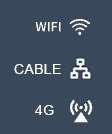
The device features 3 network statuses: WIFI (Wireless Connection), CABLE (Wired Ethernet Connection), and 4G (Cellular Connection).

This screen indicates the device is not connected to any network and requires configuration.

The device cannot connect to the Cloud Platform.

HDMI connected successfully — Video signal from the target device detected. USB connected successfully — USB input from the target device detected.

HDMI interface not connected. USB interface not connected.
1.2.4 LED Status Indicators
1.2.5 SIM Card Slot Instructions
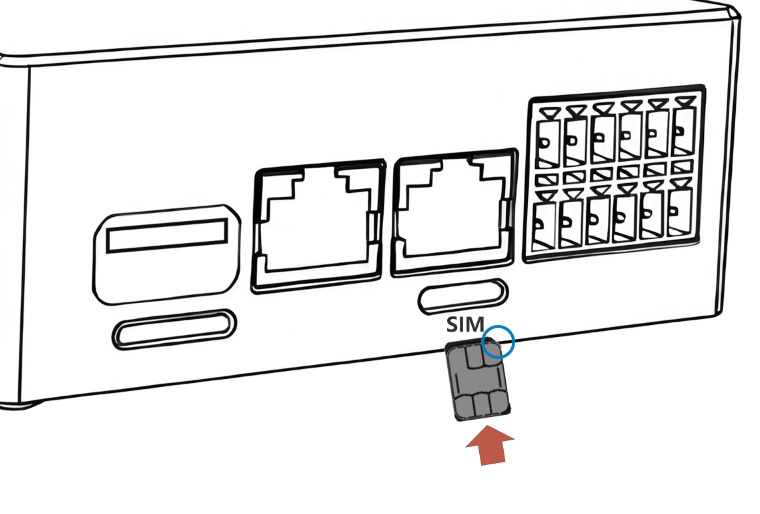
Insert the SIM card into the front SIM slot with the chip facing upward, as shown in the figure. Please ensure that the 4 antennas of the device are properly installed.
Under normal circumstances, the device will automatically detect the SIM card and recognize the signal. Please allow approximately 30 seconds for the network to initialize.
If the device fails to recognize the SIM card, it is recommended to power off the device, restart it, and wait for about 1 minute before checking again.
1.2.6 TF (MicroSD) Card Slot Instructions and Configuration
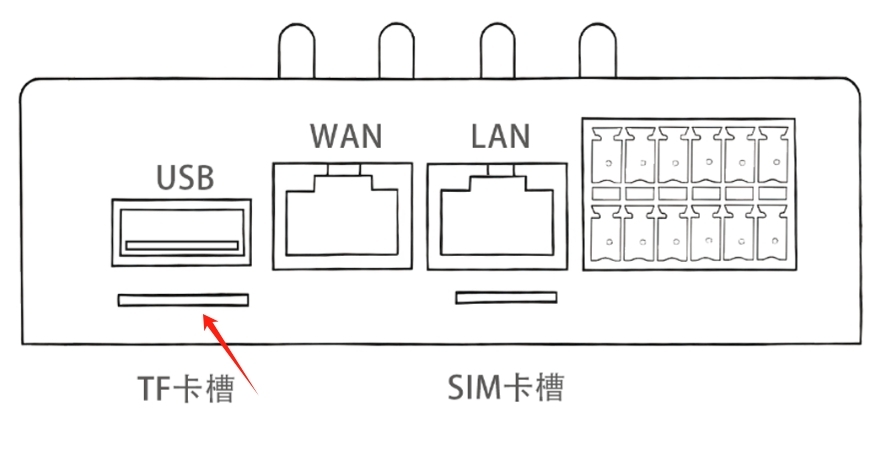
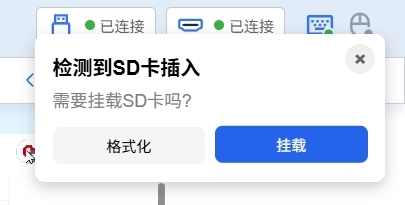
Insert the TF card into the slot. A prompt stating "SD card inserted" will appear on the remote desktop of the target device. If it is a new TF card, select "Format". If the card has been inserted and mounted previously, you can proceed to mount it directly.
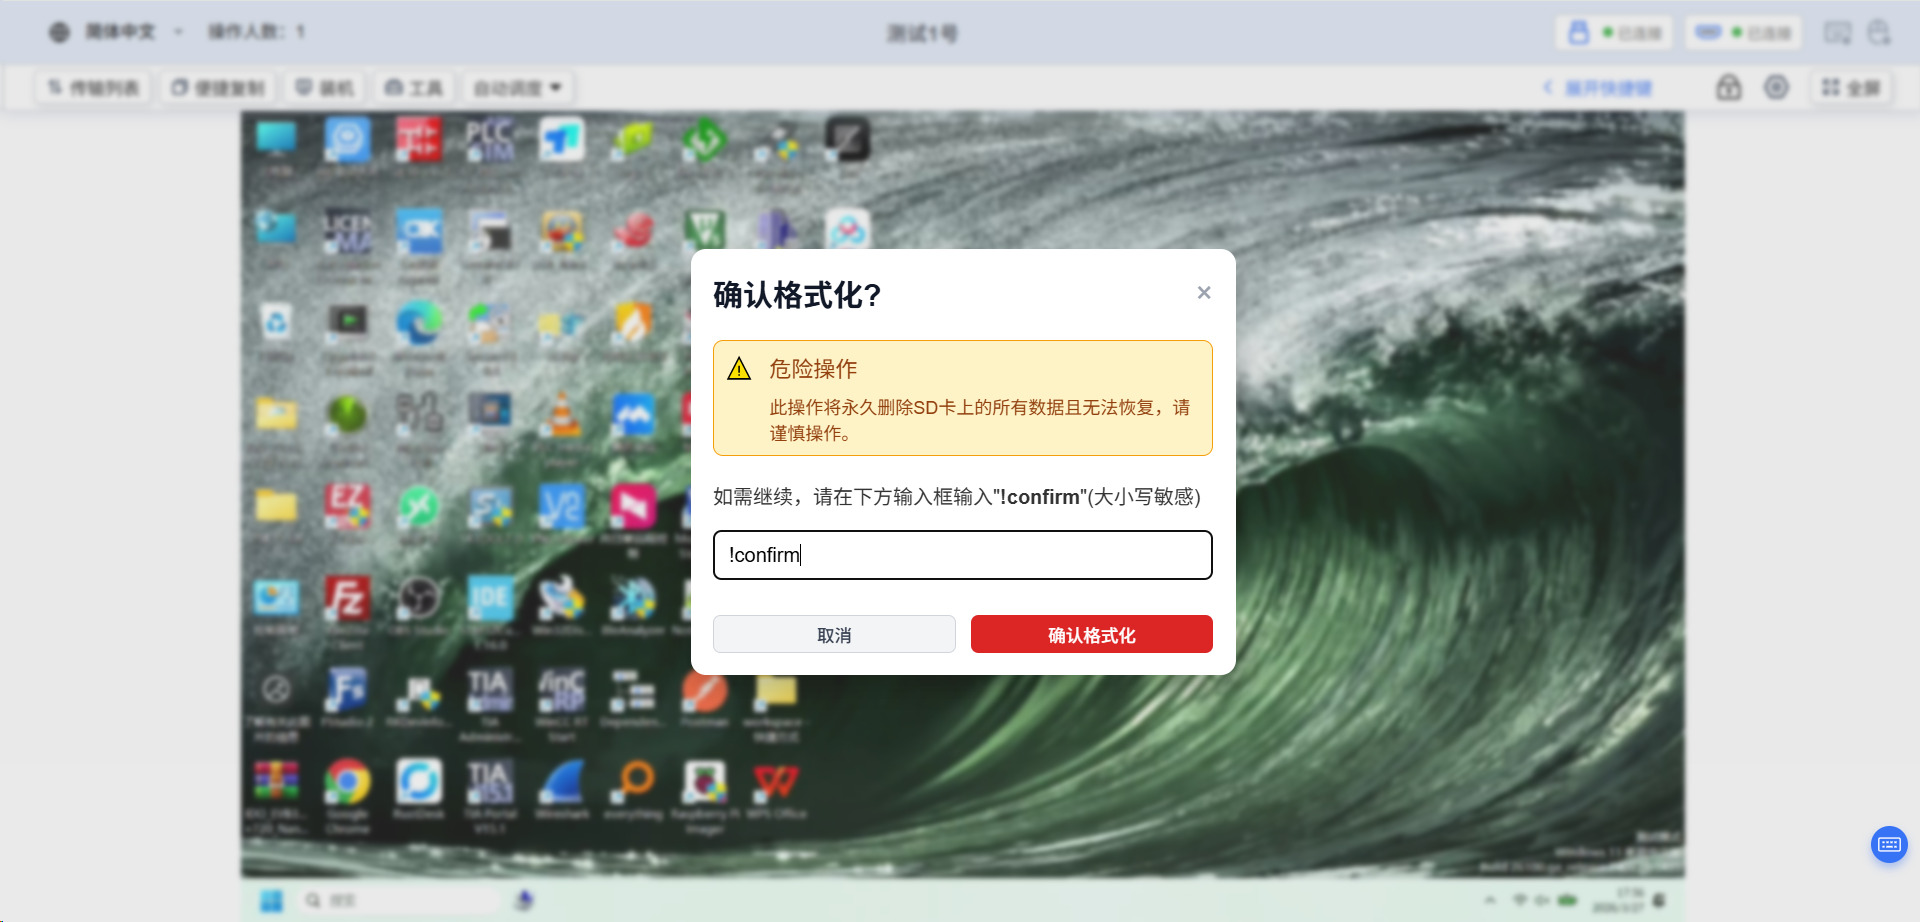
Enter !confirm to proceed with formatting.
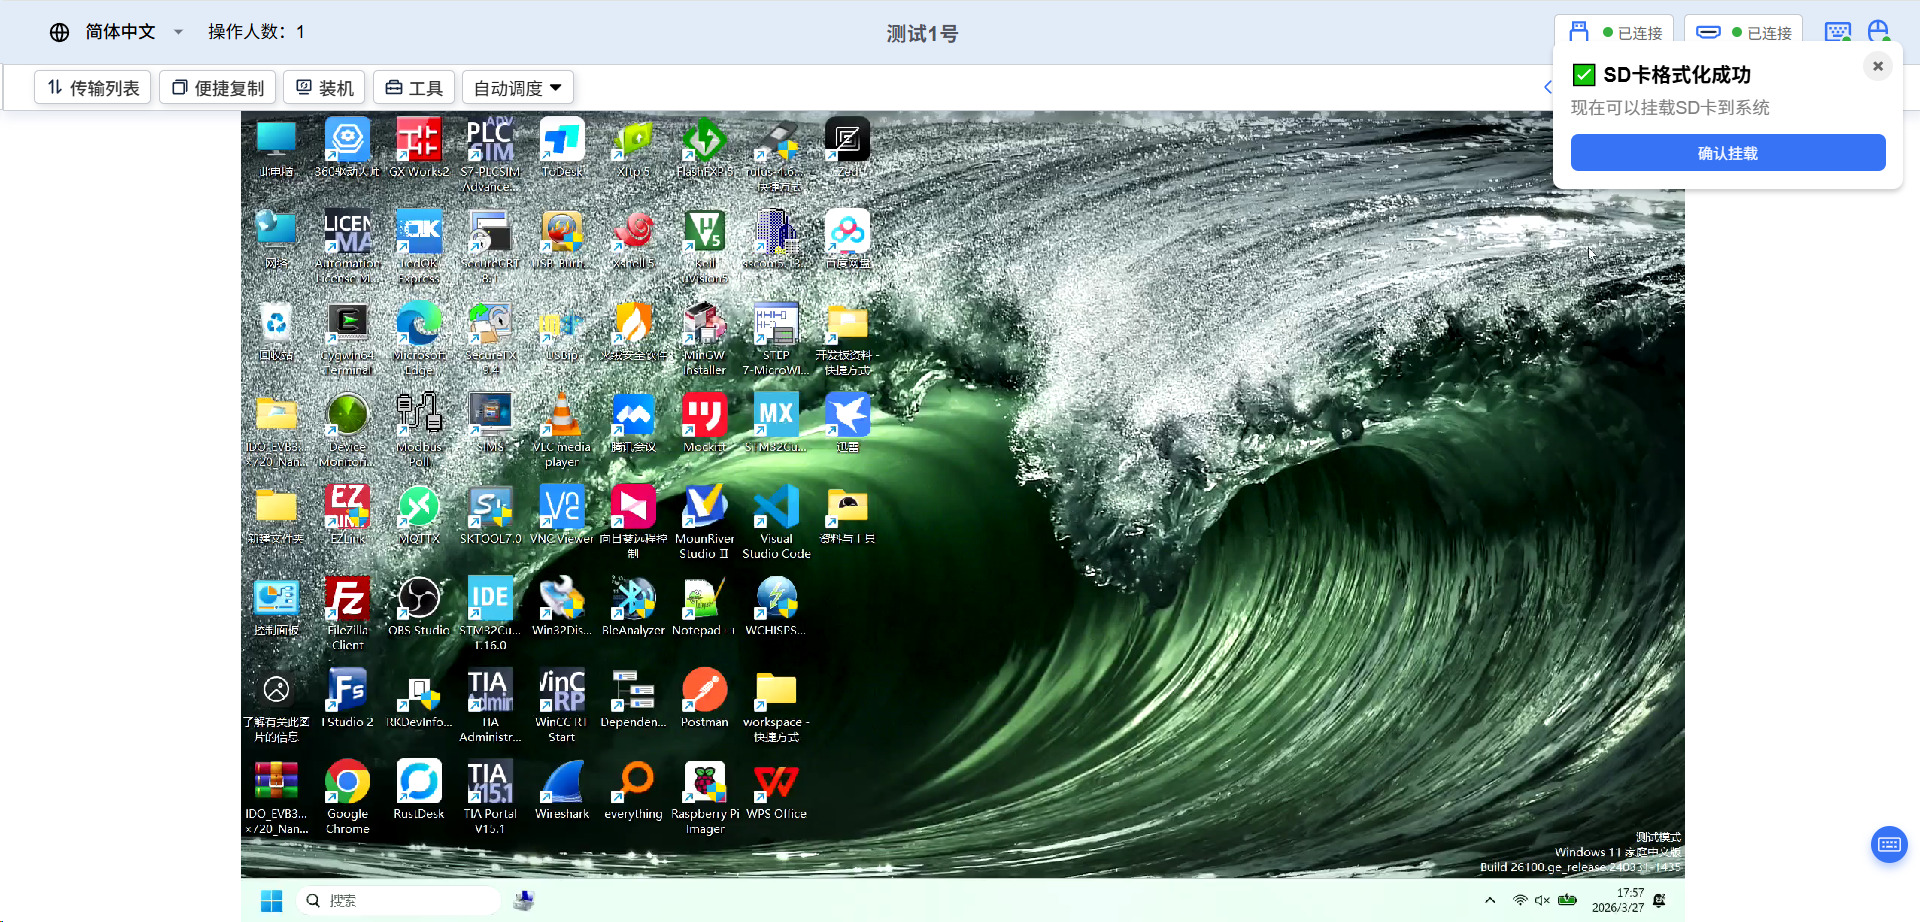
Formatting takes a few minutes. Once formatting is successful, confirm the mounting process.
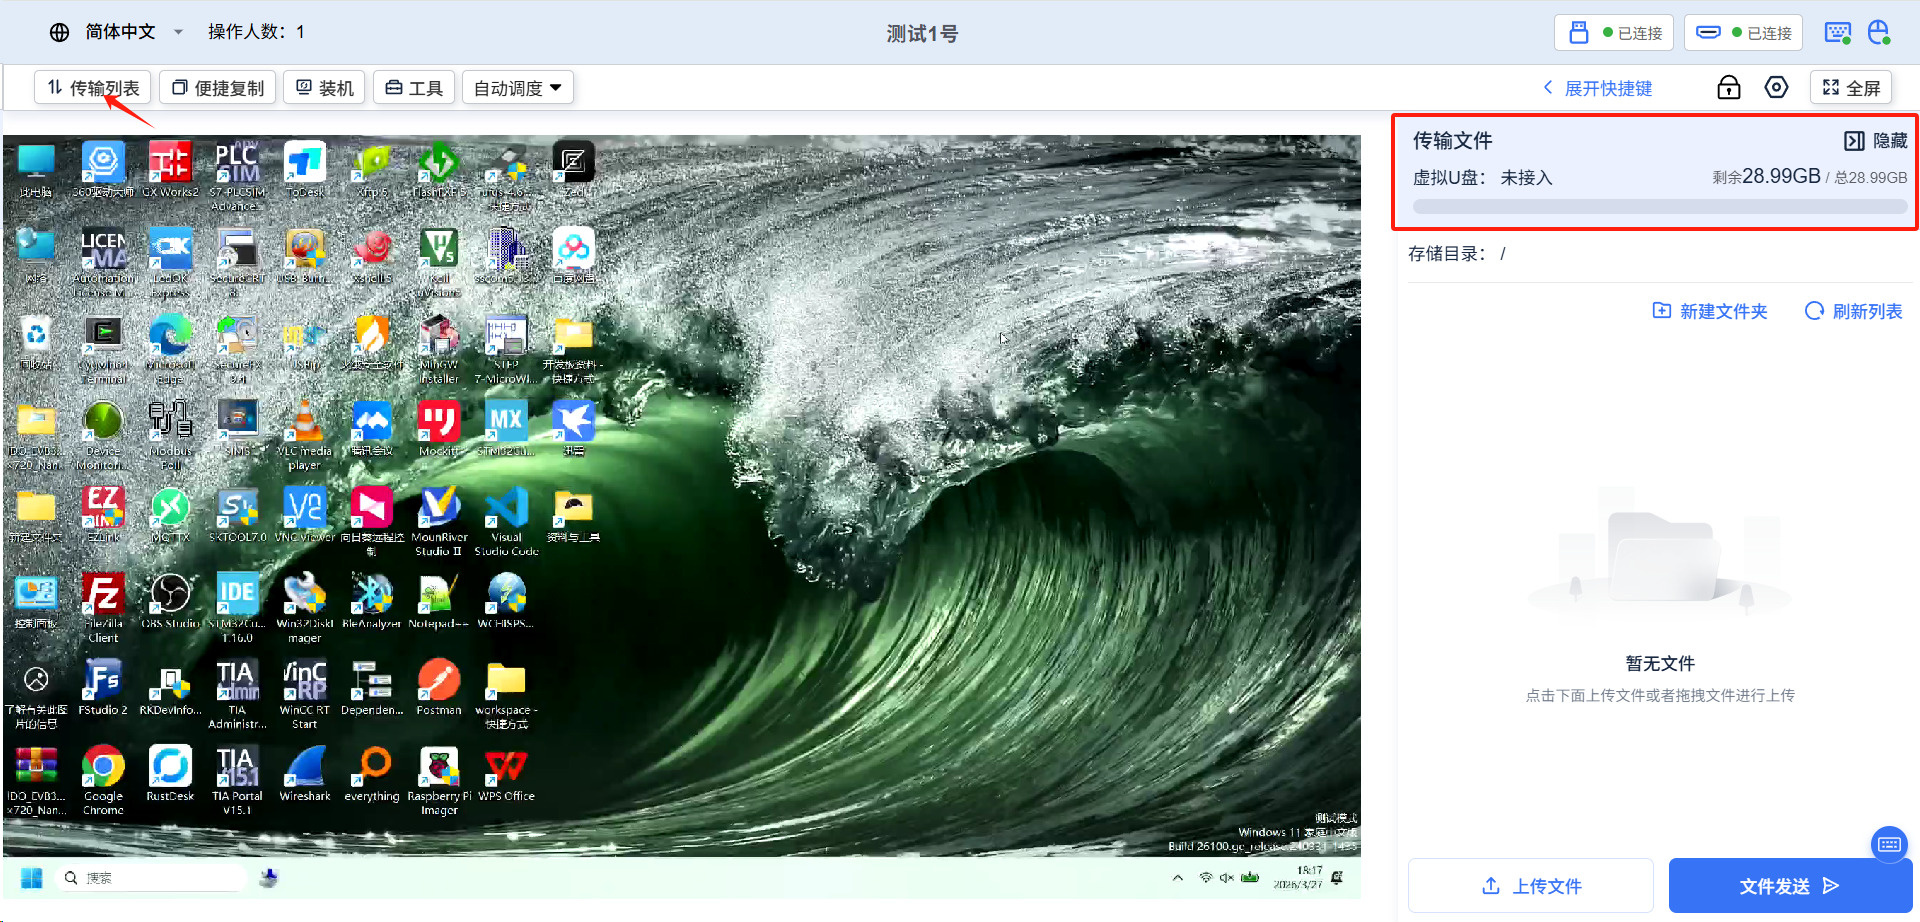
Once successfully mounted, you can view the SD card in the transfer list.
1.3 Technical Specifications and Operating Environment
CPU: Industrial-grade processor Memory: 4GB LPDDR4X (Optional) Storage: Onboard 32GB eMMC (Optional), supports TF card expansion Power Input: DC 12V Video Interfaces:
- 1× HDMI IN (Up to 1080p@60Hz)
- 1× HDMI OUT (Up to 4K@60Hz, supports loop-out)
Network Interfaces:
- 2× Gigabit Ethernet ports (RJ45)
USB Interfaces:
- 1× USB 3.0 Type-A
- 1× USB Type-C
Indicators: Power / System / Network Serial & IO:
- 2× RS485/RS232 (Configurable)
- DI/DO Alarm I/O
Wireless Communication:
- Onboard 4G (CAT4)
- WiFi 6 (802.11ax)
- Supports 5G module expansion (Customizable)
- Supports overseas 4G bands
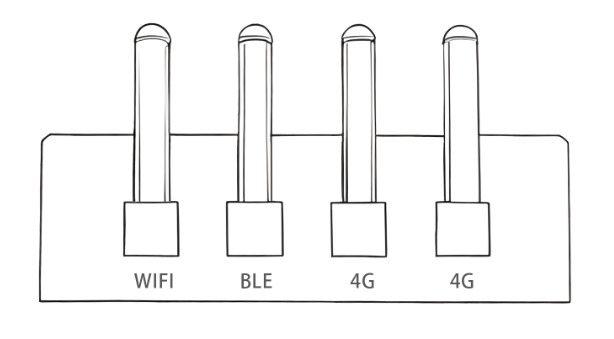
Antennas: WiFi / BLE / 4G multi-antenna design Other Specifications:
- Dimensions: 88mm × 70mm × 27mm
- 1.14-inch OLED Display
- Operating Temperature: 0-70℃
2. Quick Start: Device Deployment and Cloud Onboarding
2.1 Hardware Wiring Guide
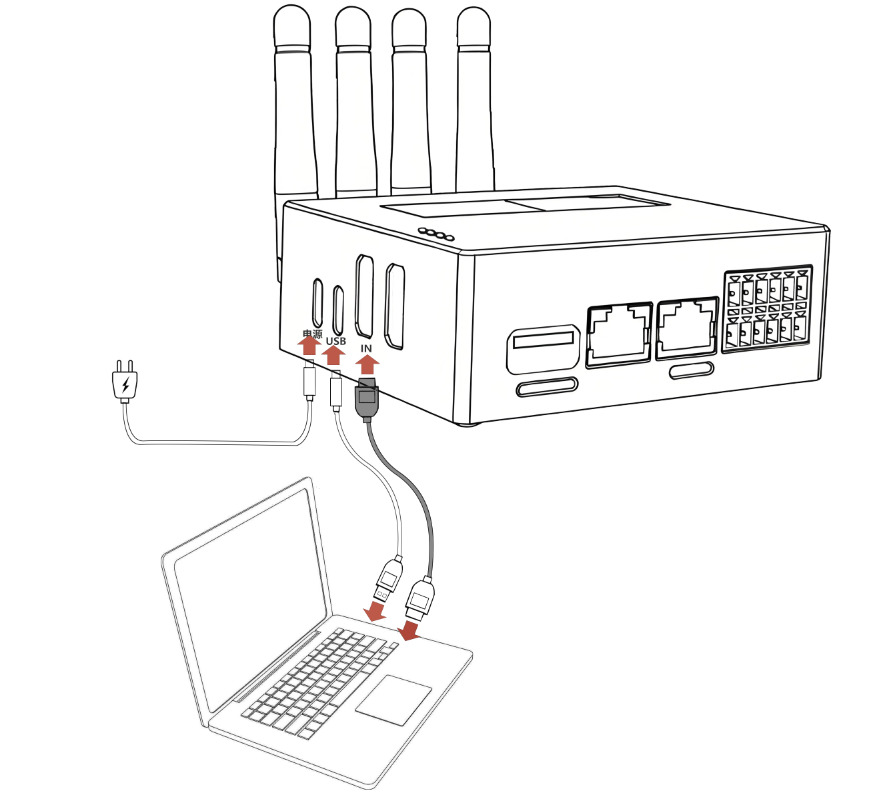
Connect the SmartControl PRO to the network via Ethernet, Wi-Fi, or 4G. Then, connect the SmartControl PRO to the target device using HDMI/USB cables as illustrated above.
2.2 Accessing the QuickDesk Cloud Platform
2.2.1 Method 1: Direct Access via Mobile QR Code Scanning
Scan the QR code on the back of the gateway device or open the [QuickDesk Cloud Platform].
2.2.2 Method 2: Access via Web Browser on PC
Enter the [QuickDesk Cloud Platform] URL: https://access.quickdesk.com.cn/
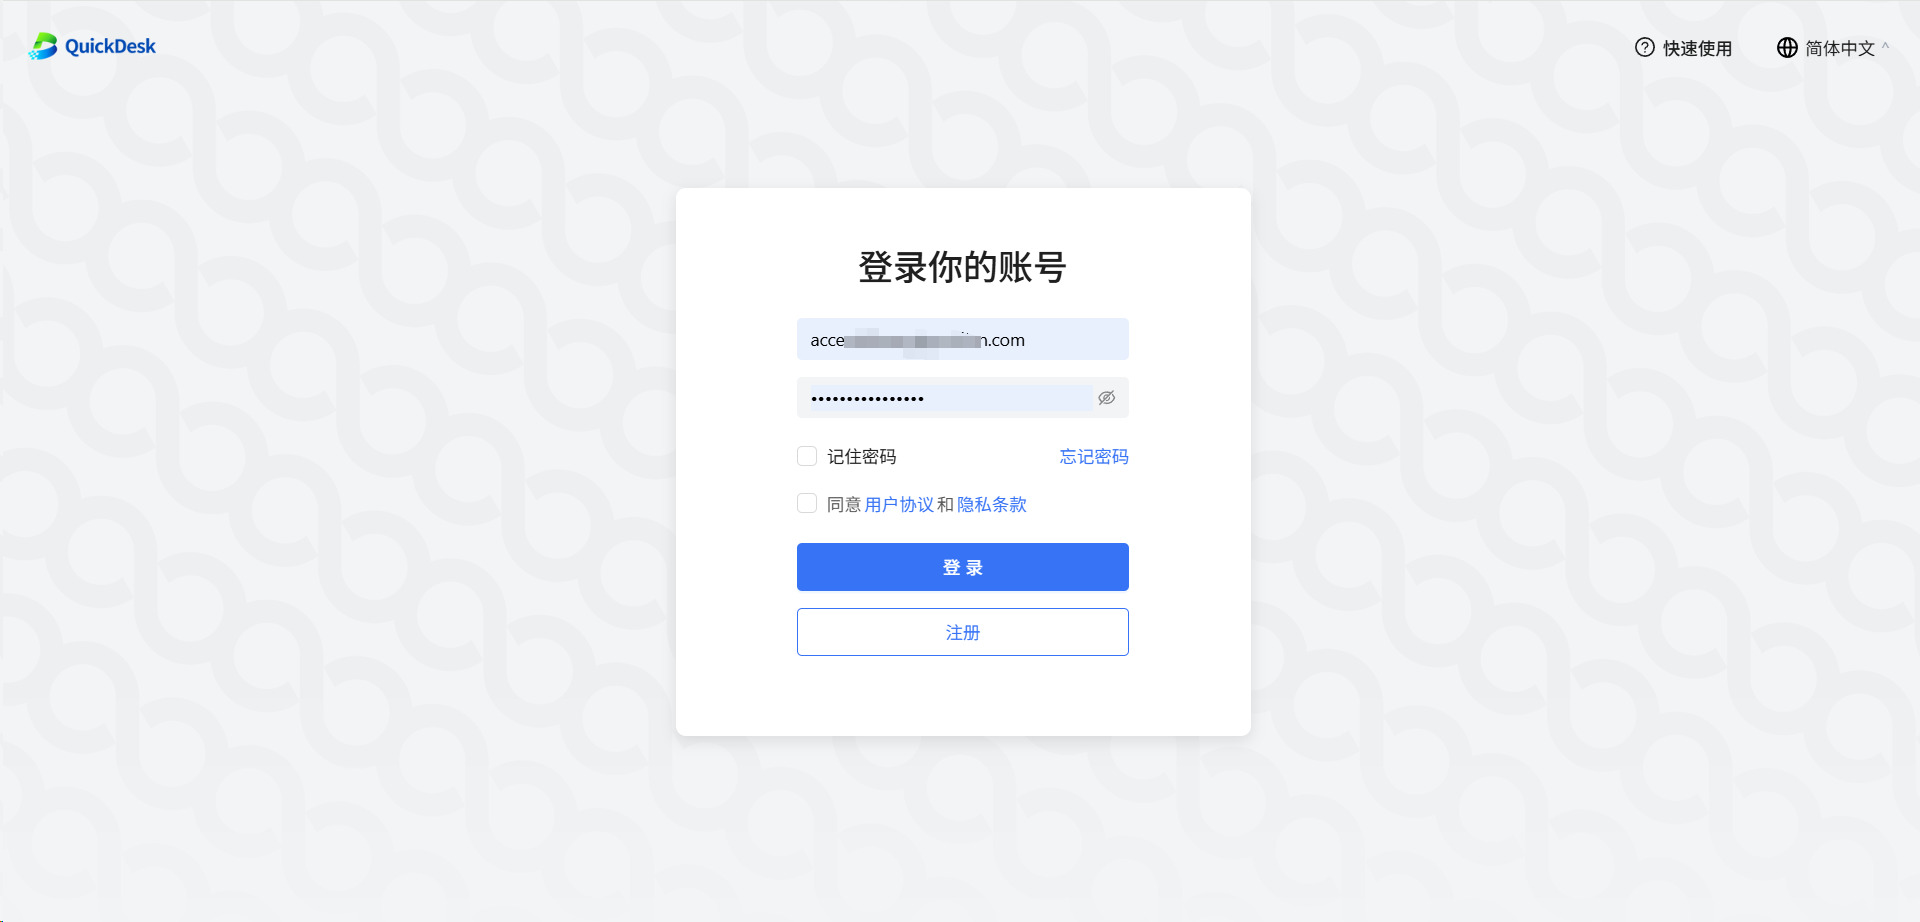
2.3 Account Registration and Login
2.3.1 Registering a New User Account
Click the [Sign Up] button on the platform page to navigate to the registration interface.
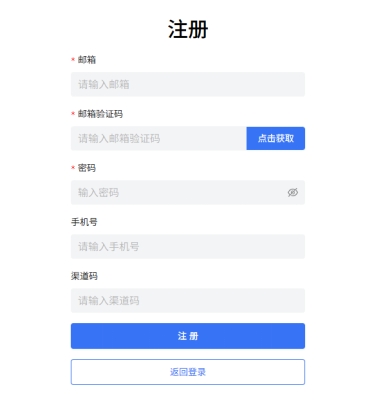
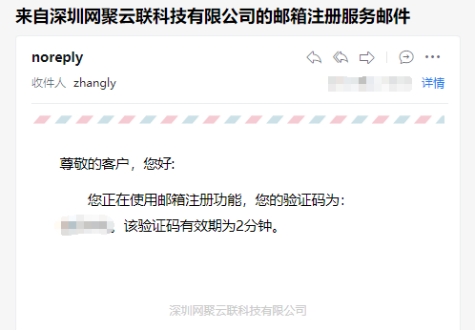
Enter your email address and retrieve the verification code sent to your inbox.
Fill out the form completely and submit to successfully register your account.
2.3.2 Logging into the QuickDesk Console
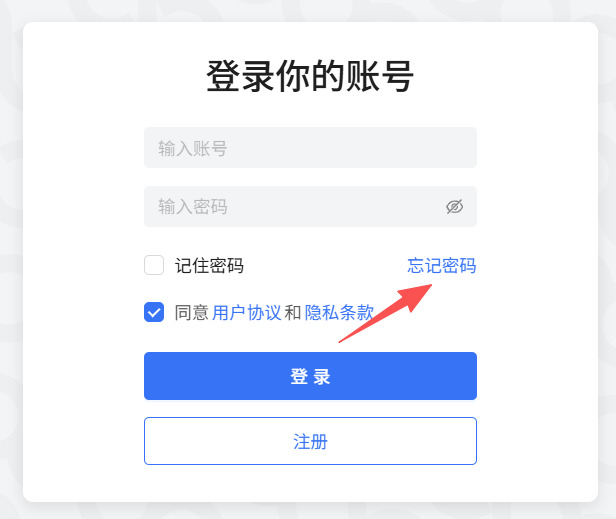
Once registration is complete, use your username and password to log in.
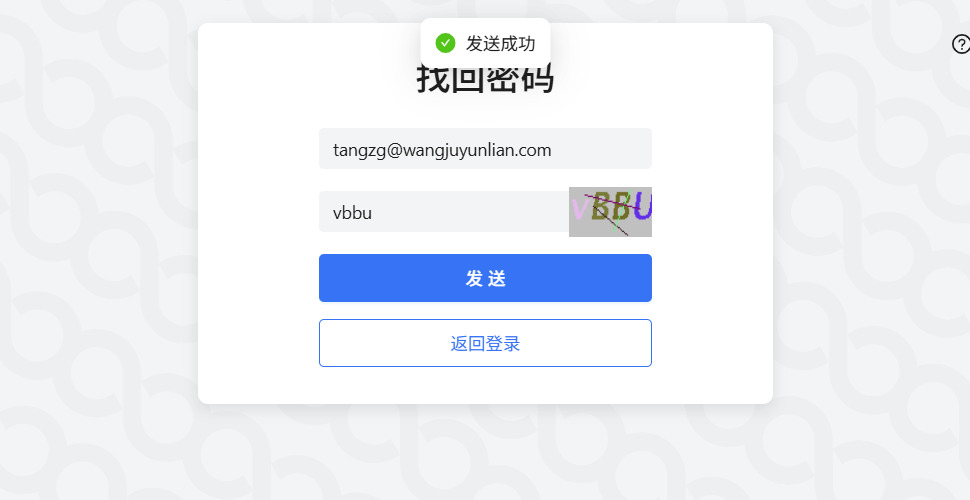
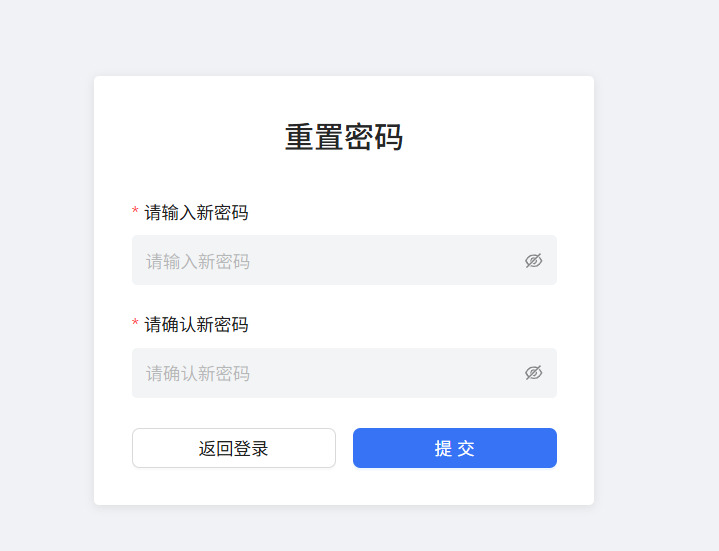
2.3.3 Password Recovery and Reset
2.4 Network Configuration for SmartControl PRO
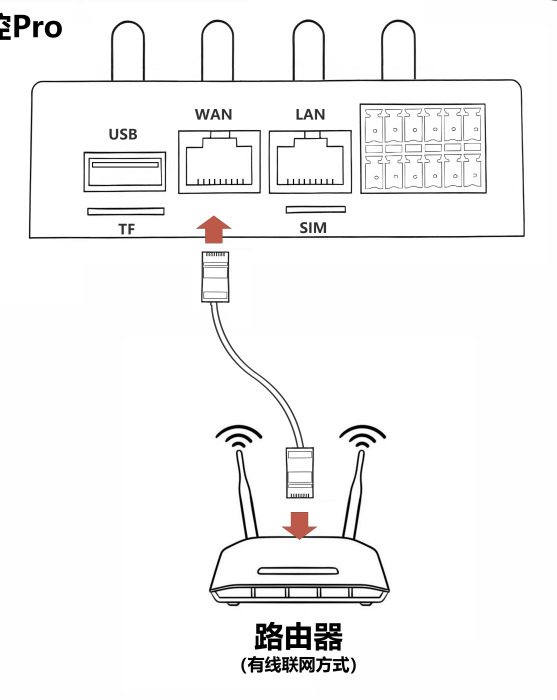
2.4.1 Method 1: Wired Network Configuration (Ethernet to WAN port)
Connect one end of the Ethernet cable to the LAN port of your router and the other end to the WAN port of the SmartControl PRO. Power on the device and wait for the wired connection to establish.
2.4.2 Method 2: 4G Cellular Network Configuration (Insert SIM card)
Ensure the SmartControl PRO is powered off. Insert the 4G SIM card into the slot, then power on the device and wait for it to automatically connect to the 4G network.
2.4.3 Method 3: Wireless Network Configuration
Refer to Section 2.5 (Adding and Managing Devices on the Cloud Platform) to configure Wi-Fi via Bluetooth.
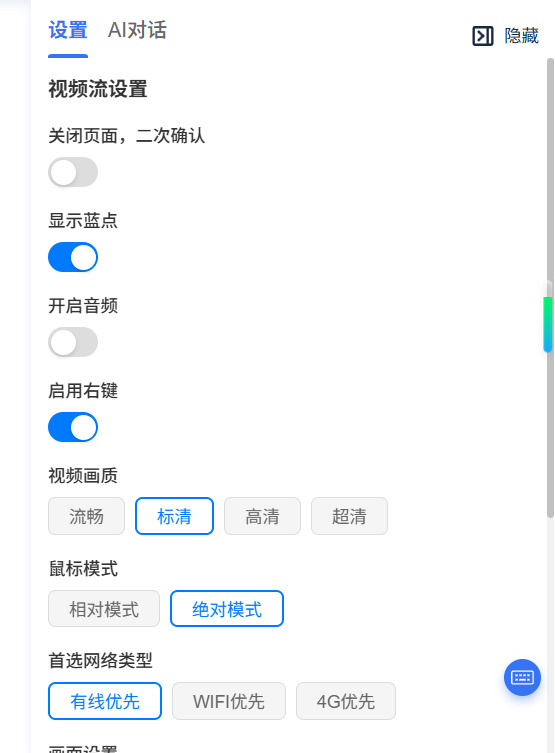
2.4.4 Network Priority Switching (Ethernet/Wi-Fi/4G)
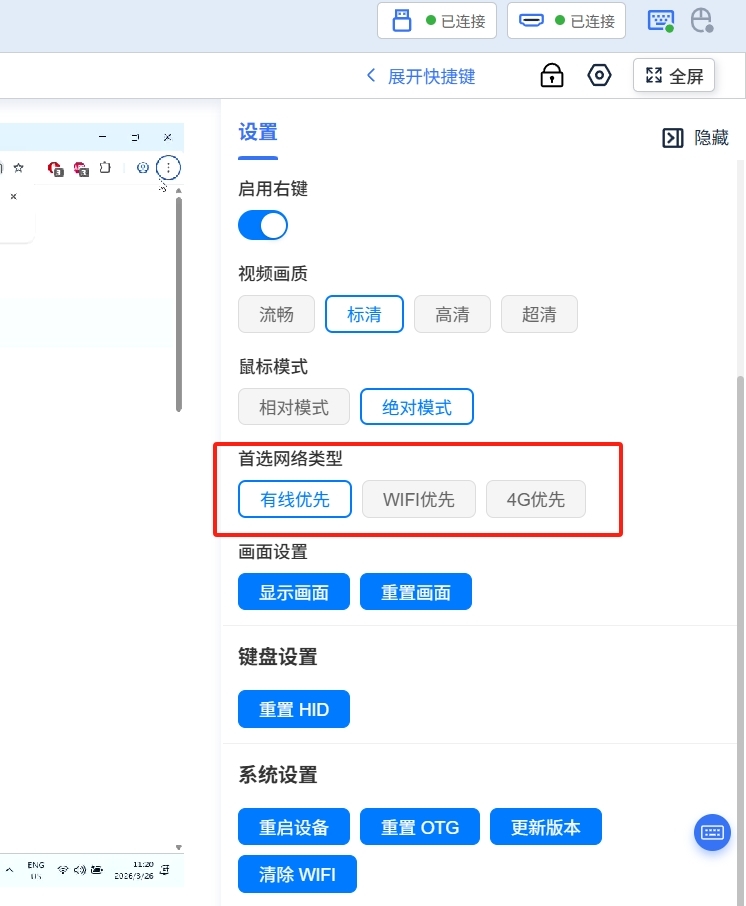
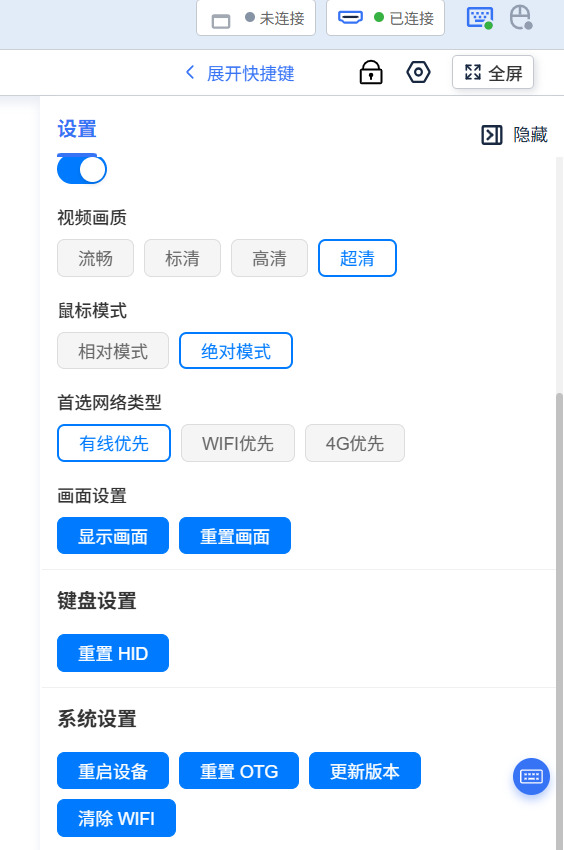
On the target device's remote desktop, click the configuration icon in the top right corner. In the settings menu, select your preferred network type: Ethernet Priority / Wi-Fi Priority / 4G Priority.
2.5 Adding and Managing Devices on the Cloud Platform
Click "Add Device".
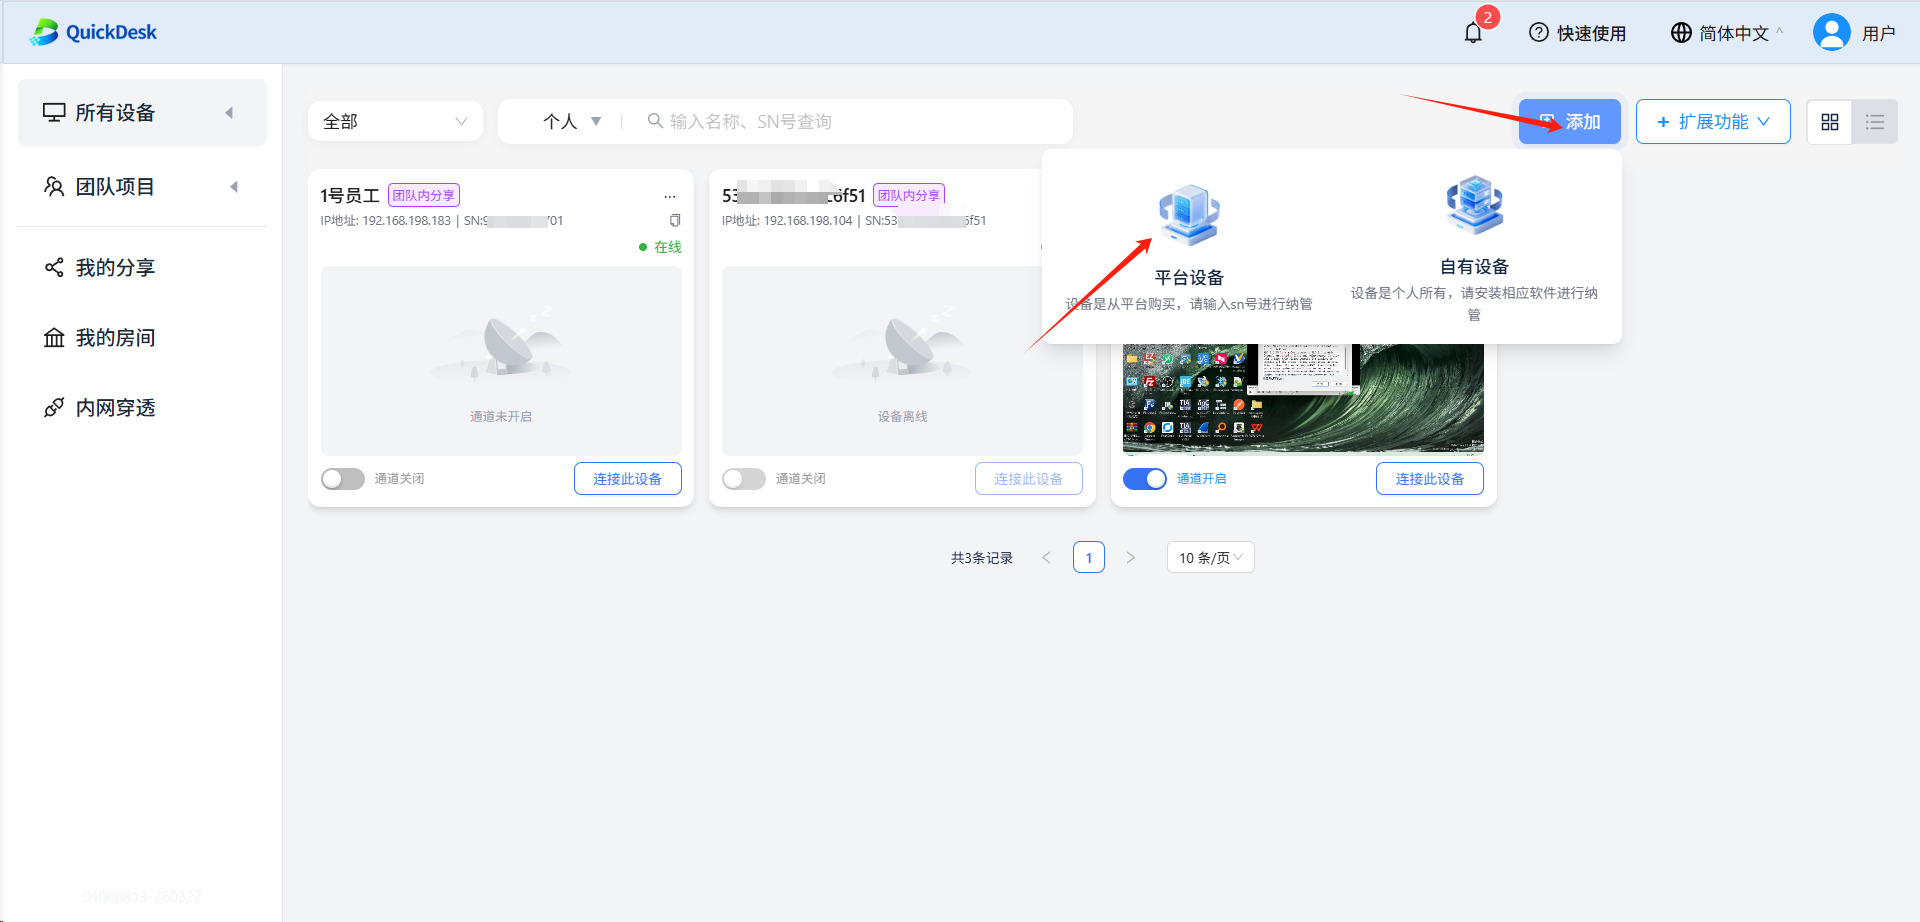
2.5.1 Method 1: Auto-Discover and Add via Bluetooth
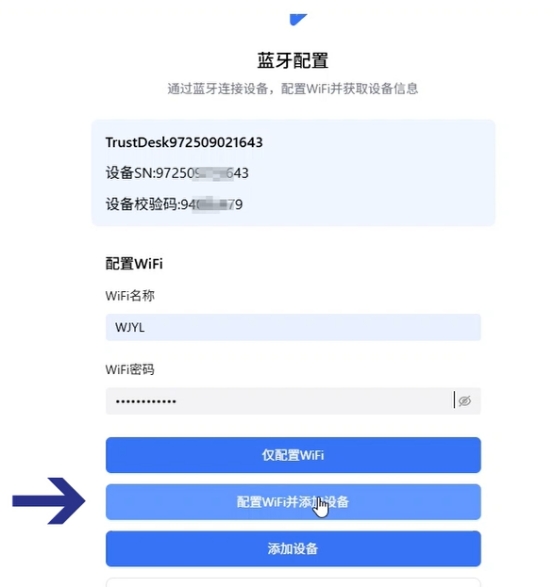
Click "Configure WIFI".
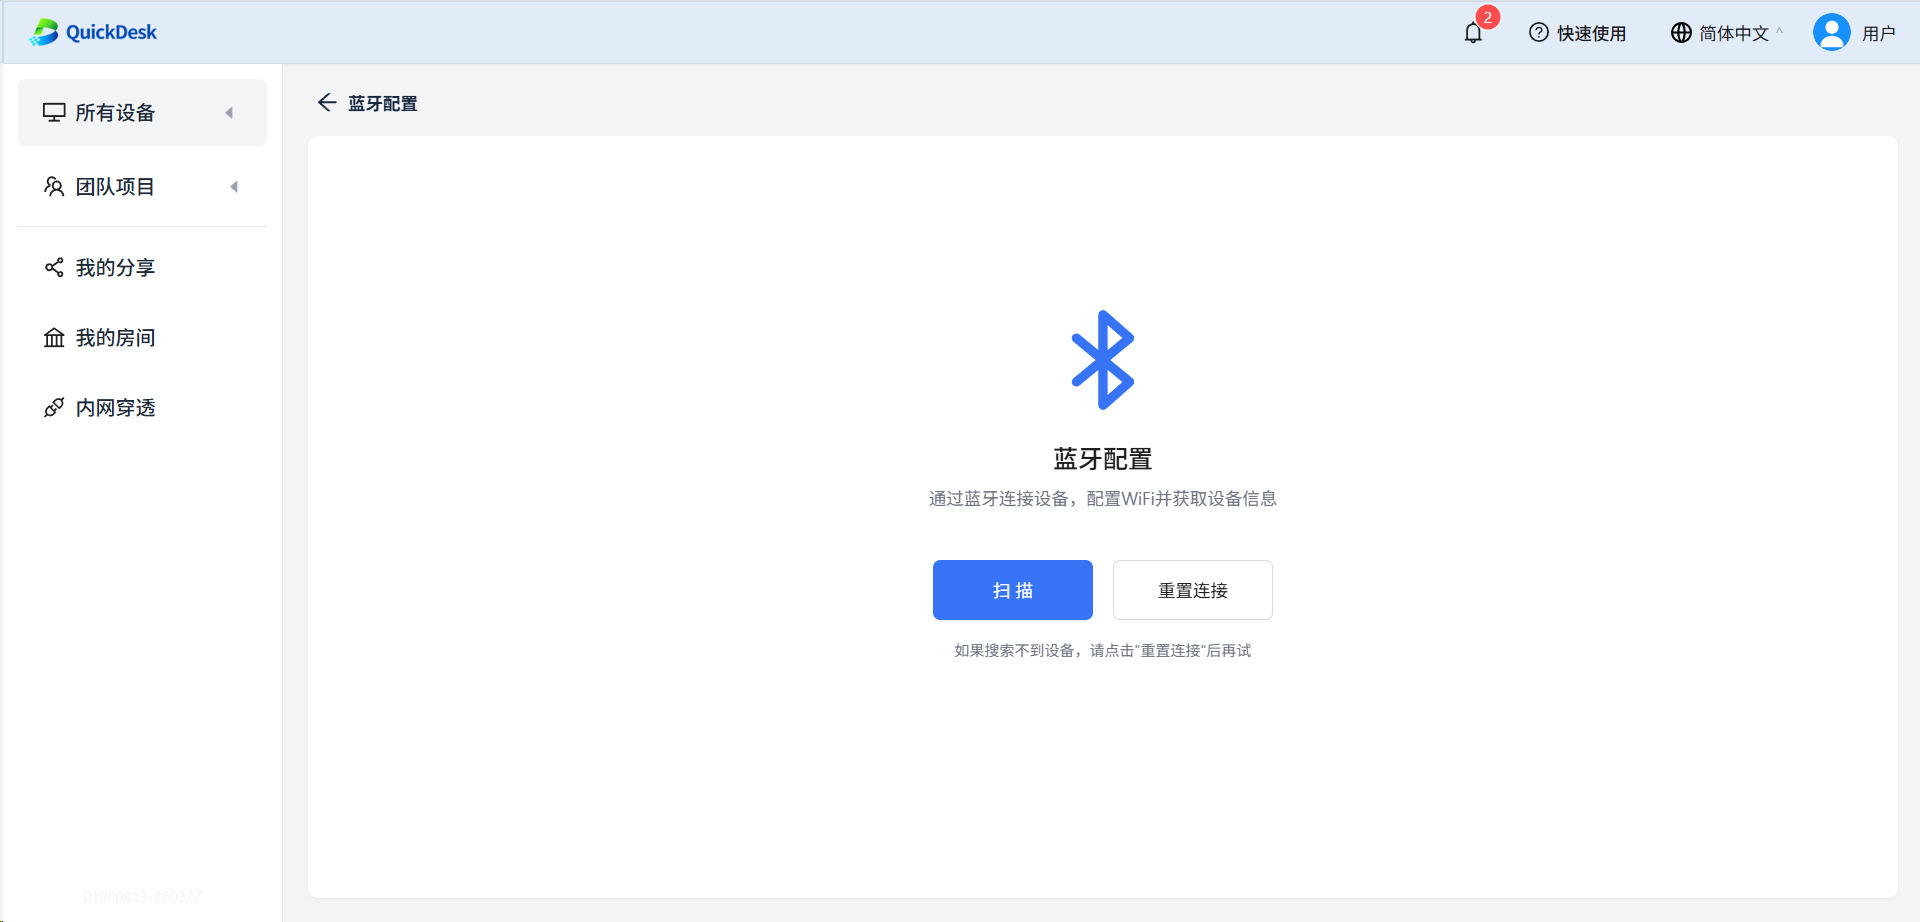
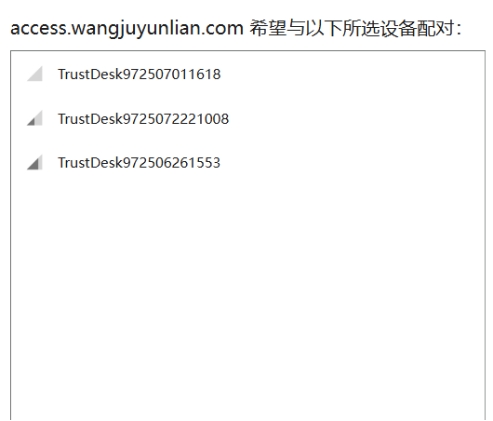
Select the device you wish to manage.
You can configure the Wi-Fi network at this stage. Enter the SSID and password, then click [Configure WIFI & Add Device]. If Wi-Fi configuration is not needed, simply click [Only Configure WIFI].
Addition complete.
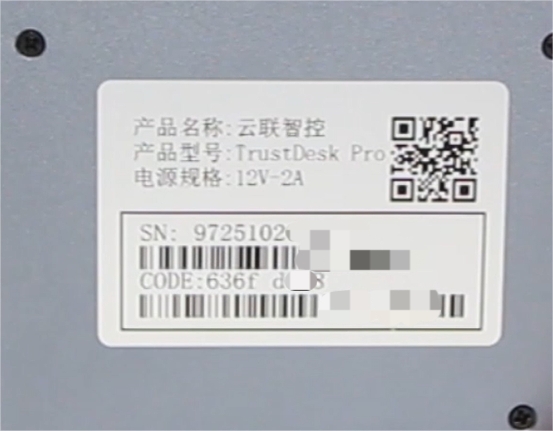
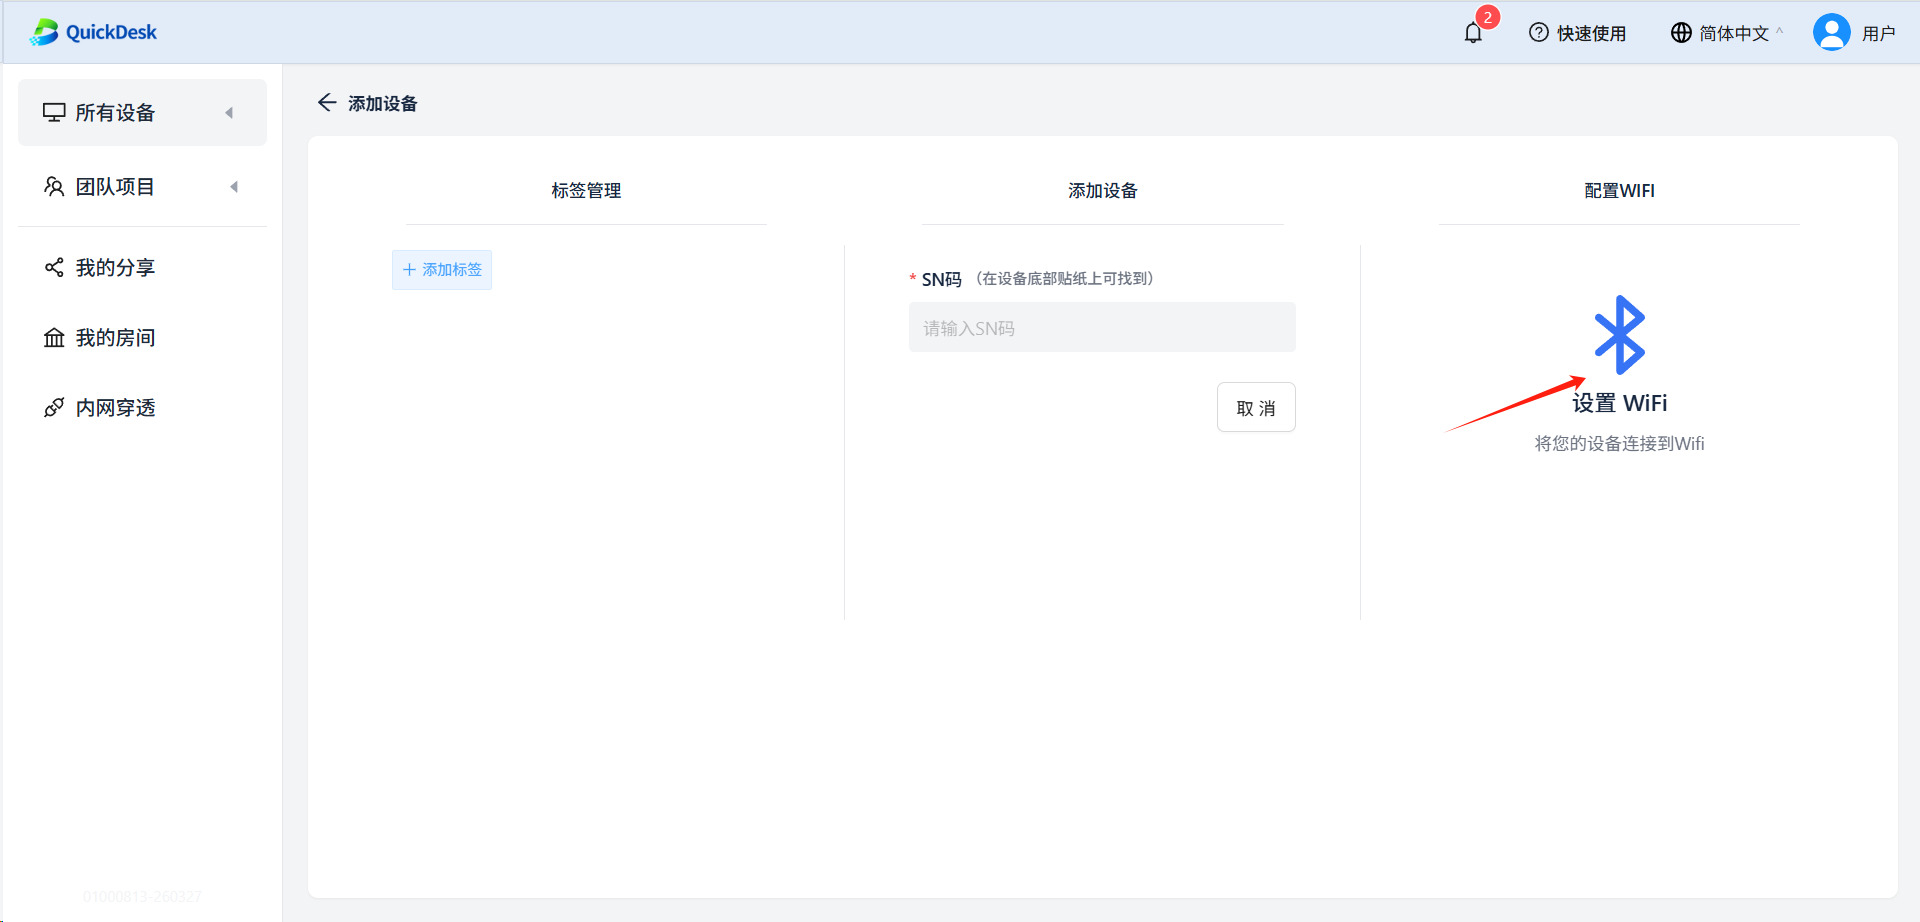
2.5.2 Method 2: Manually Add via SN and Verification Code
Locate the sticker on the back of the device. Enter the 12-digit SN (Serial Number) and the 8-digit verification code.

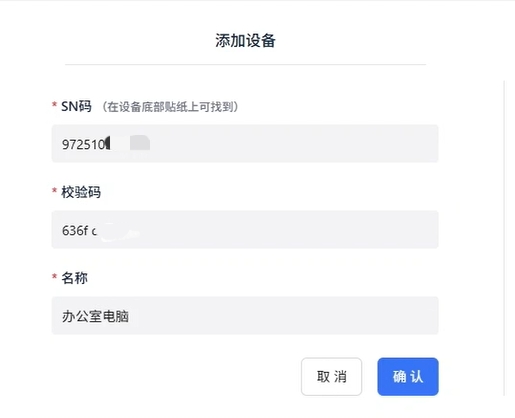
Addition complete.
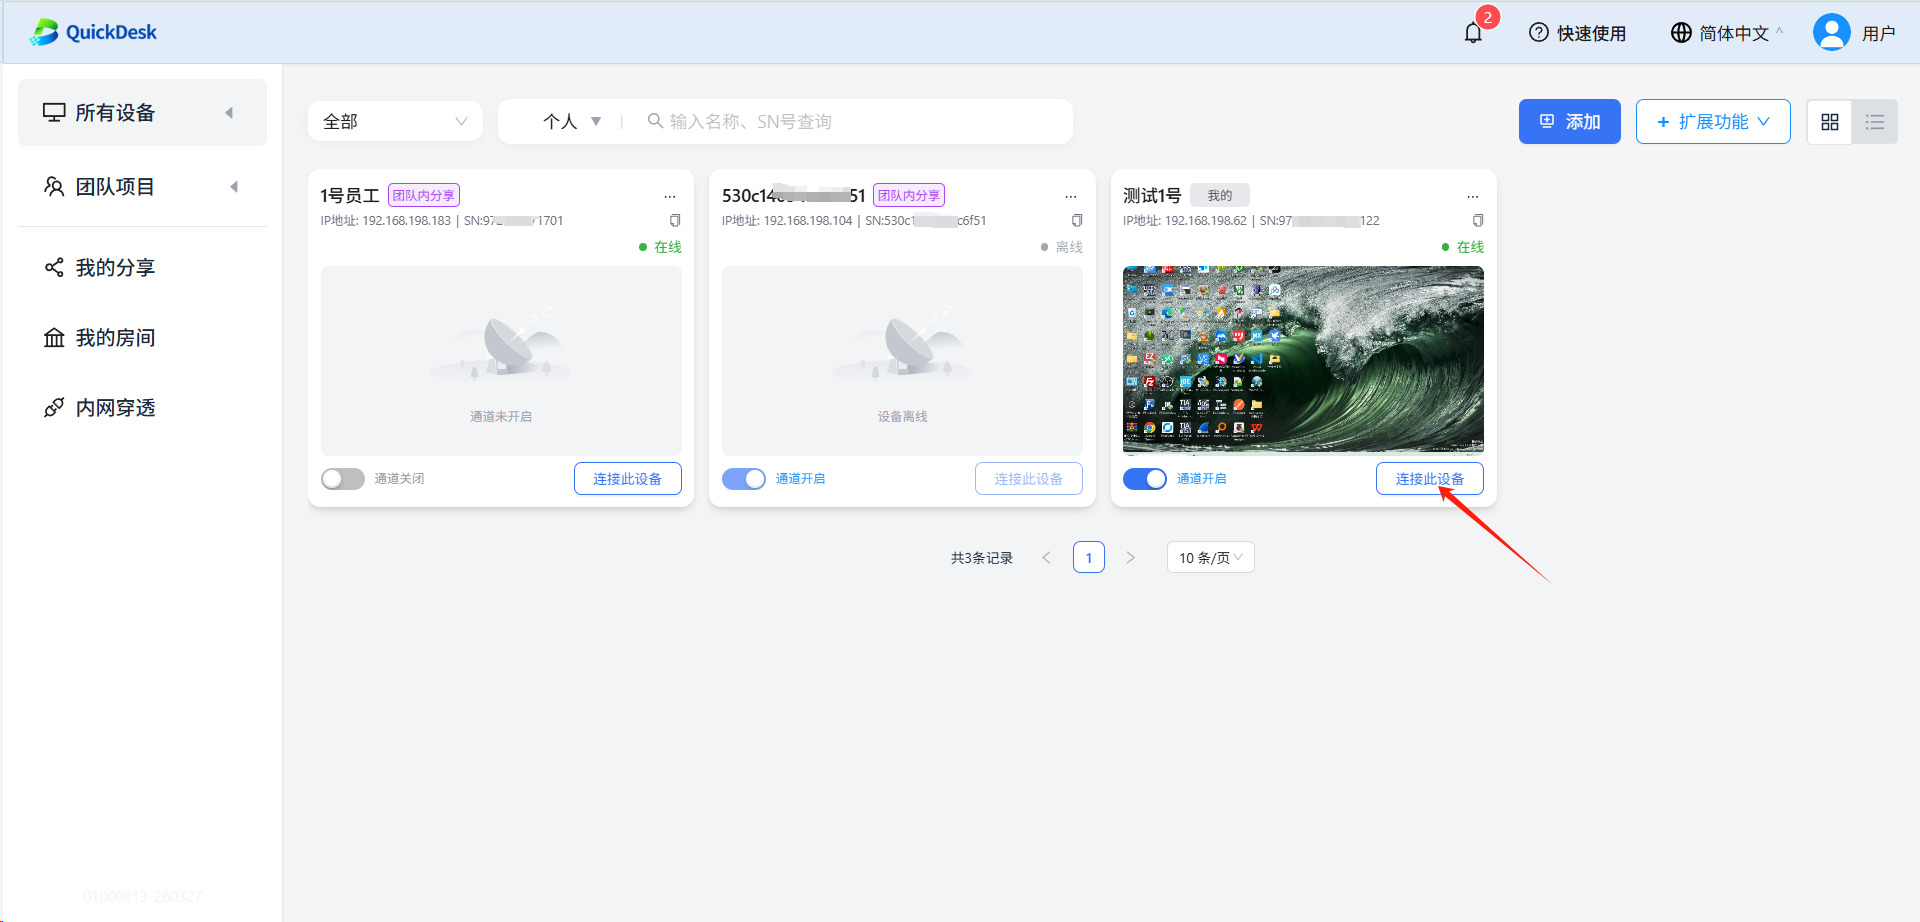
2.5.3 Verify Device Online Status and Basic Information
3. Core Operations: IP-KVM and Cloud Features
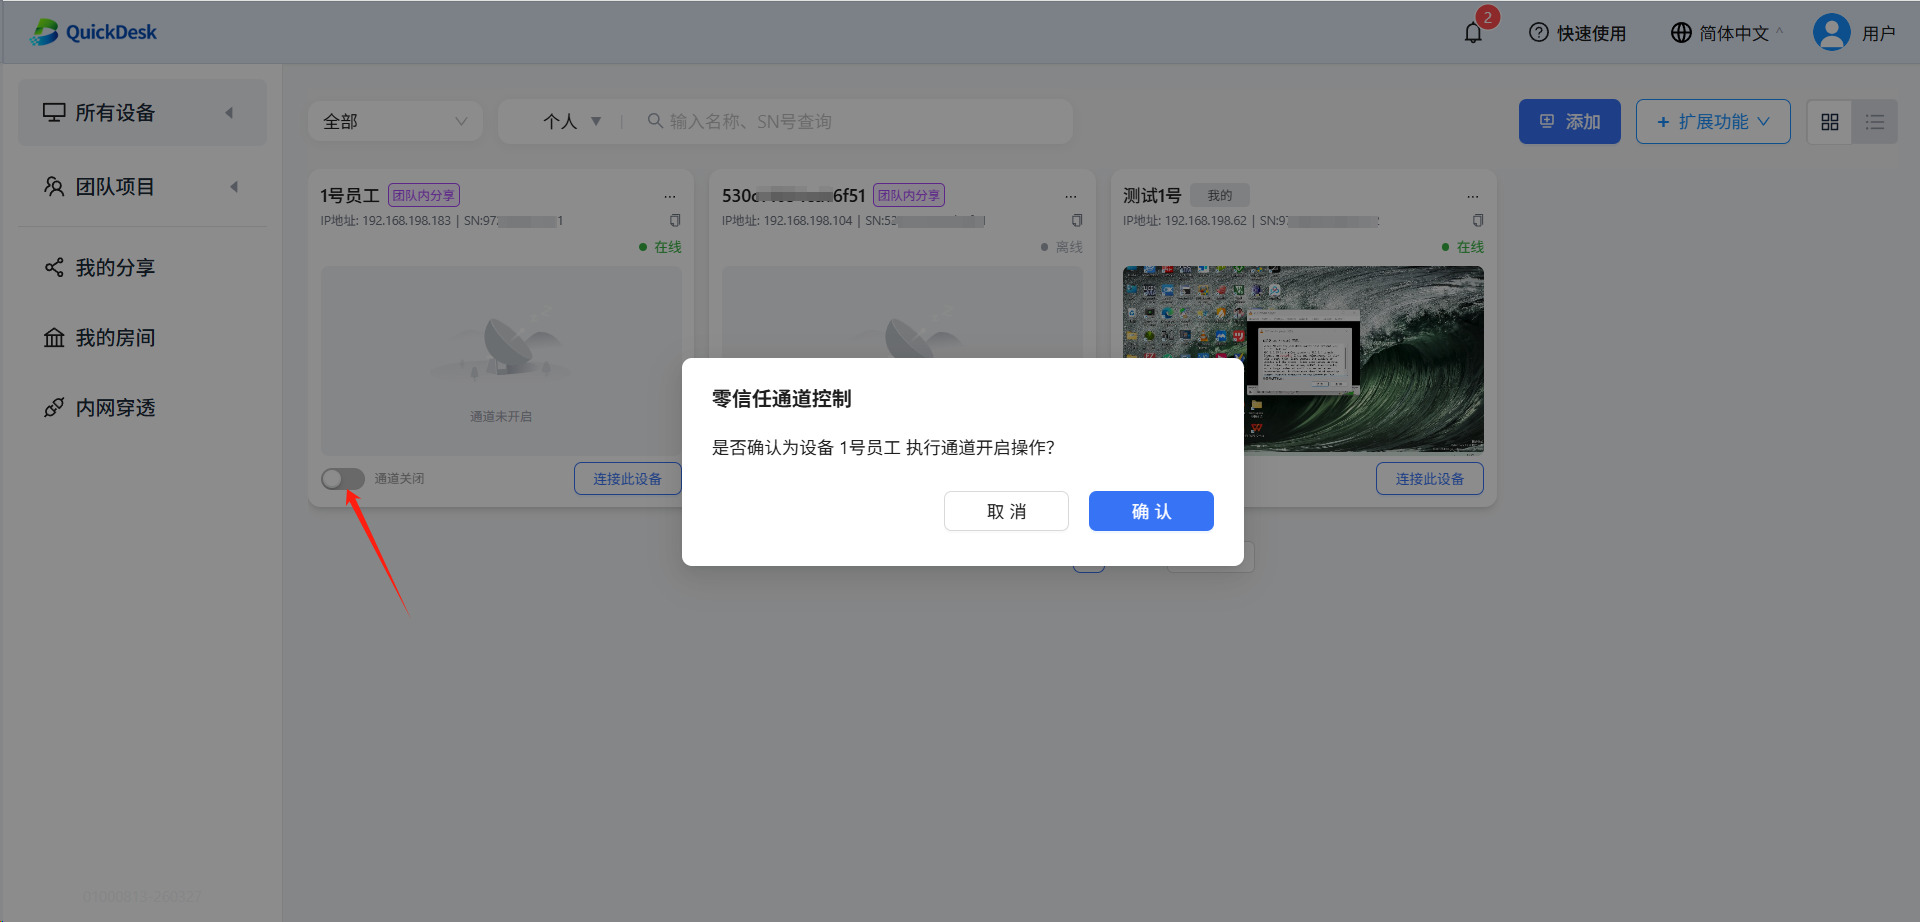
3.1 Enabling Zero Trust Tunnel for Secure Connections
Click the device and enable the Zero Trust Channel.
3.2 Launching IP-KVM Remote Desktop
3.2.1 Remote Control via PC Web Browser
Navigate to https://access.quickdesk.com.cn/

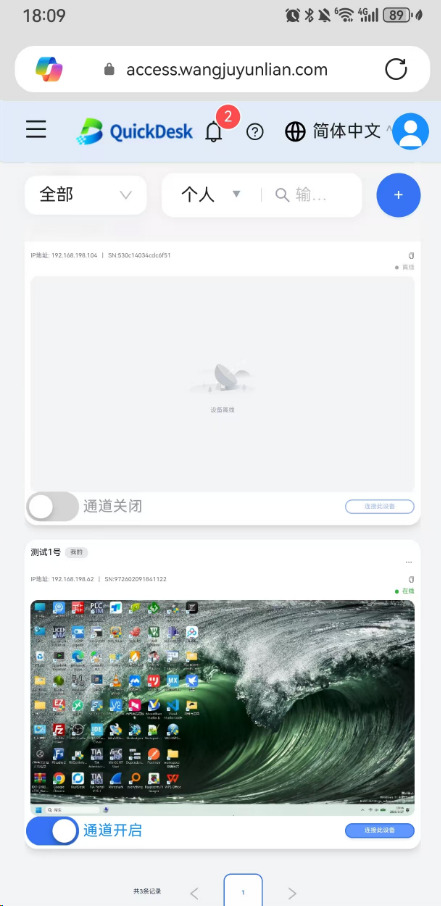
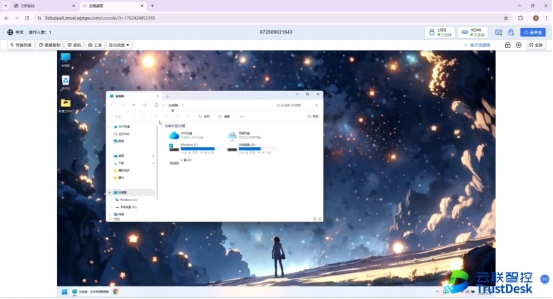
Click to connect to the device.
A new page will open, launching the remote desktop interface.

3.2.2 Remote Control via Mobile/Tablet Web Browser
Open the browser on your mobile device and navigate to https://access.quickdesk.com.cn/ Log in with your credentials. Select the device to initiate the remote desktop.
Portrait mode display:
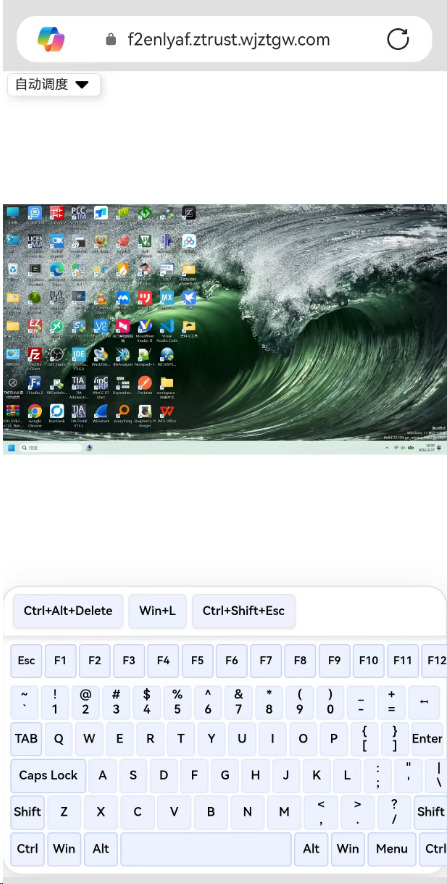
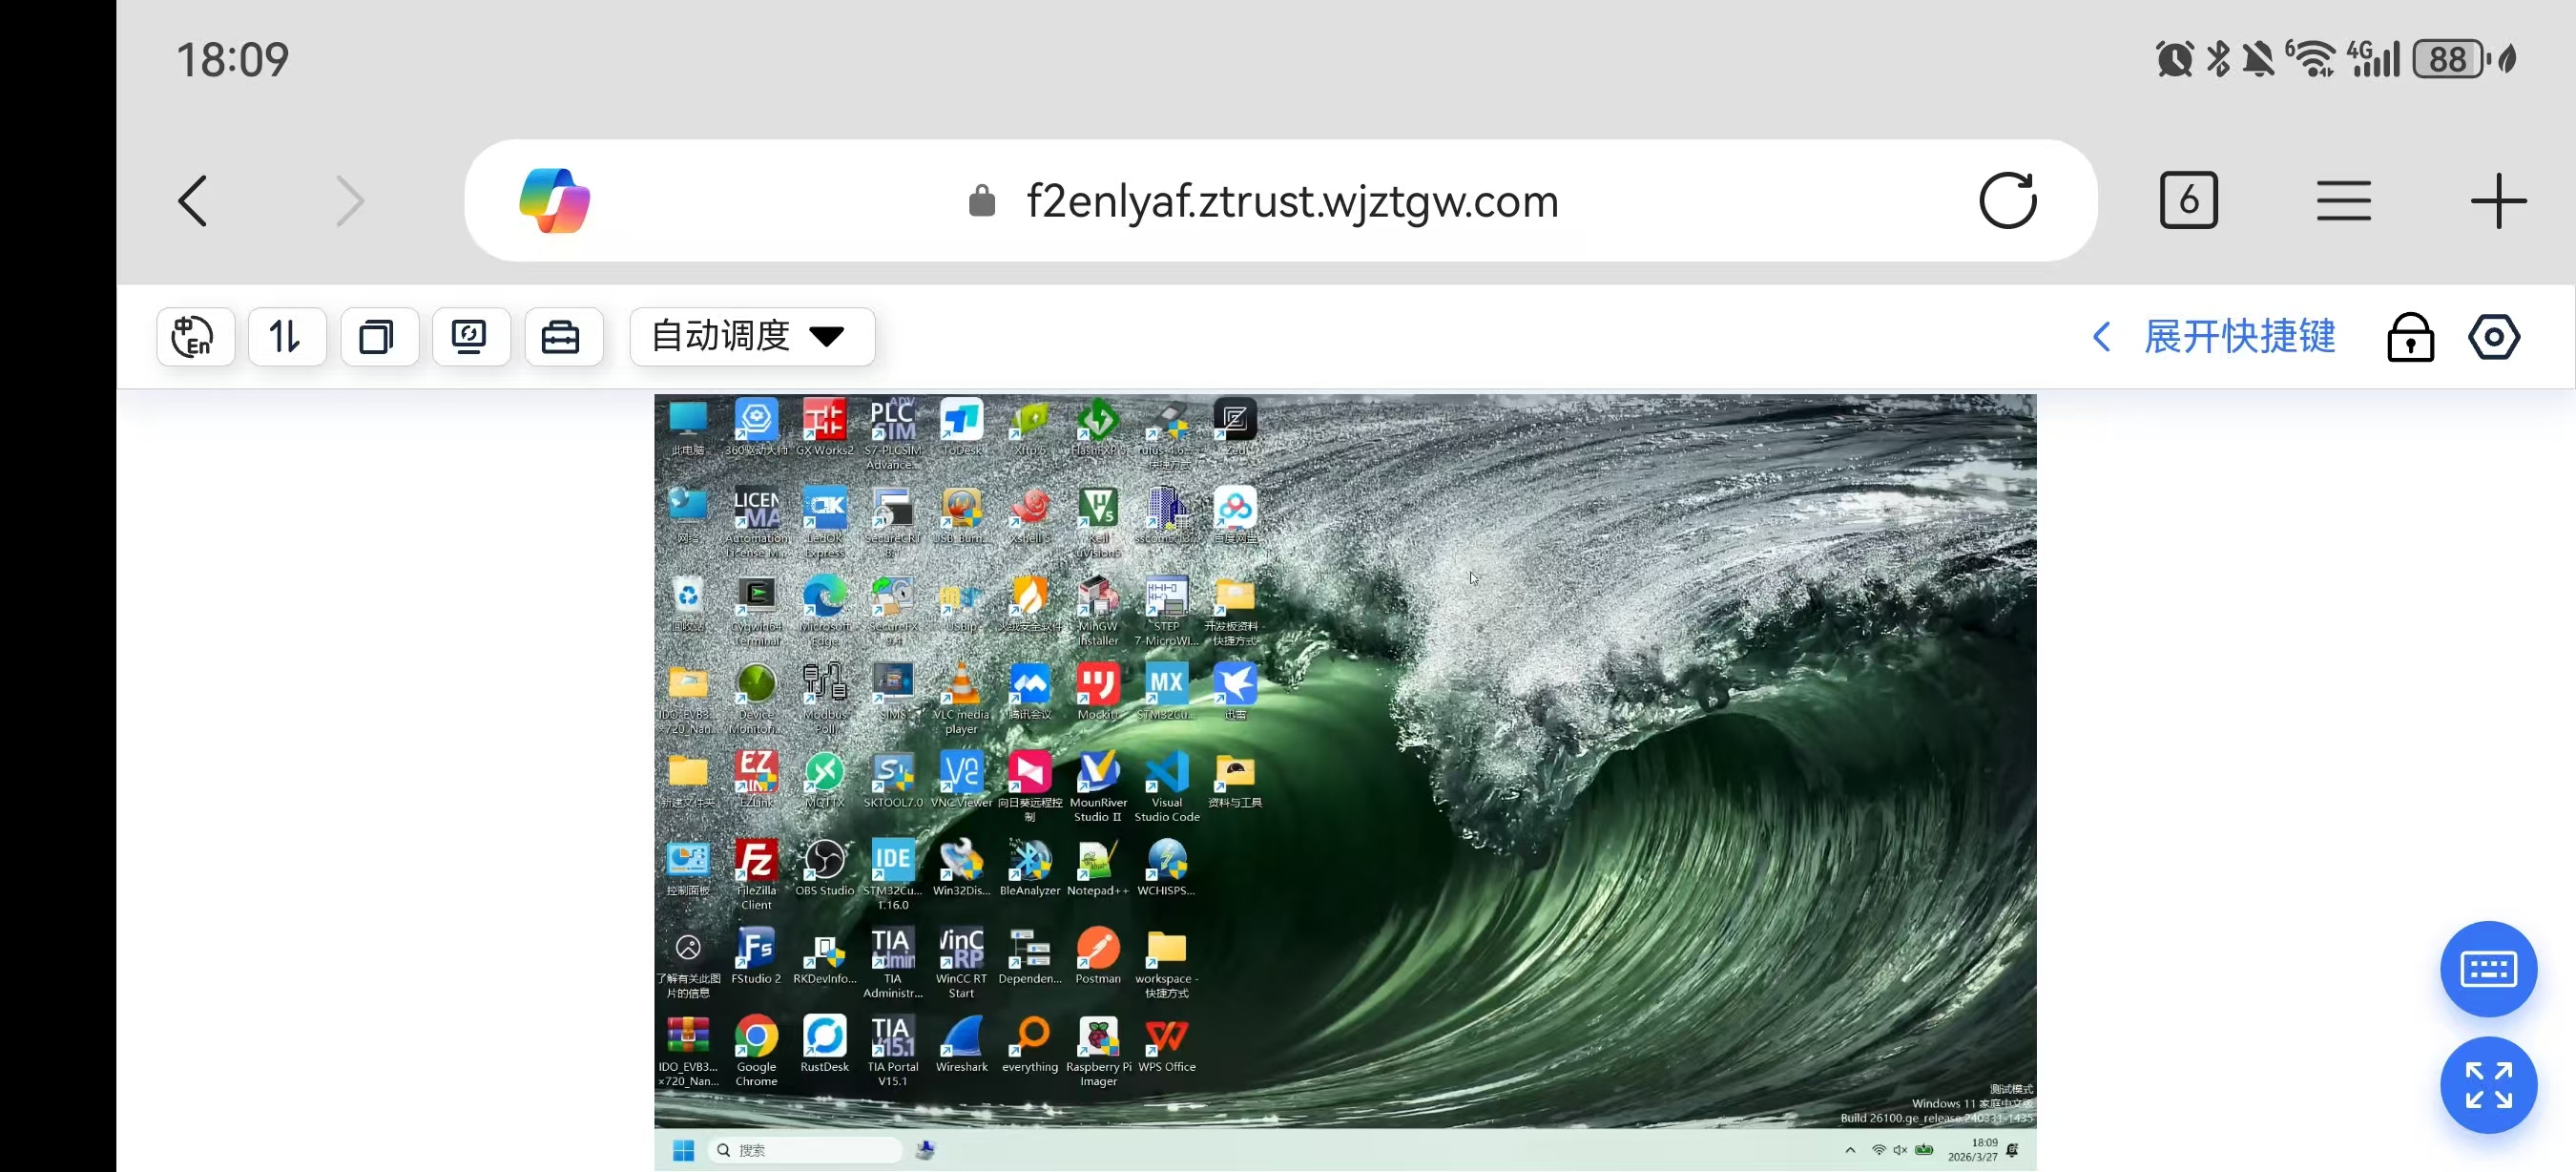
For optimal control, rotate your mobile device to Landscape mode.
3.3 OS Reinstallation (Virtual Media Mounting)
3.3.1 Prepare the OS ISO Image
The OS image can be prepared via local upload or remote download. ① Local Upload: Upload the image directly to the SmartControl PRO. ② Remote Download: SmartControl PRO fetches the image via a download link.

3.3.2 Mount the Image to the Target Device via Cloud
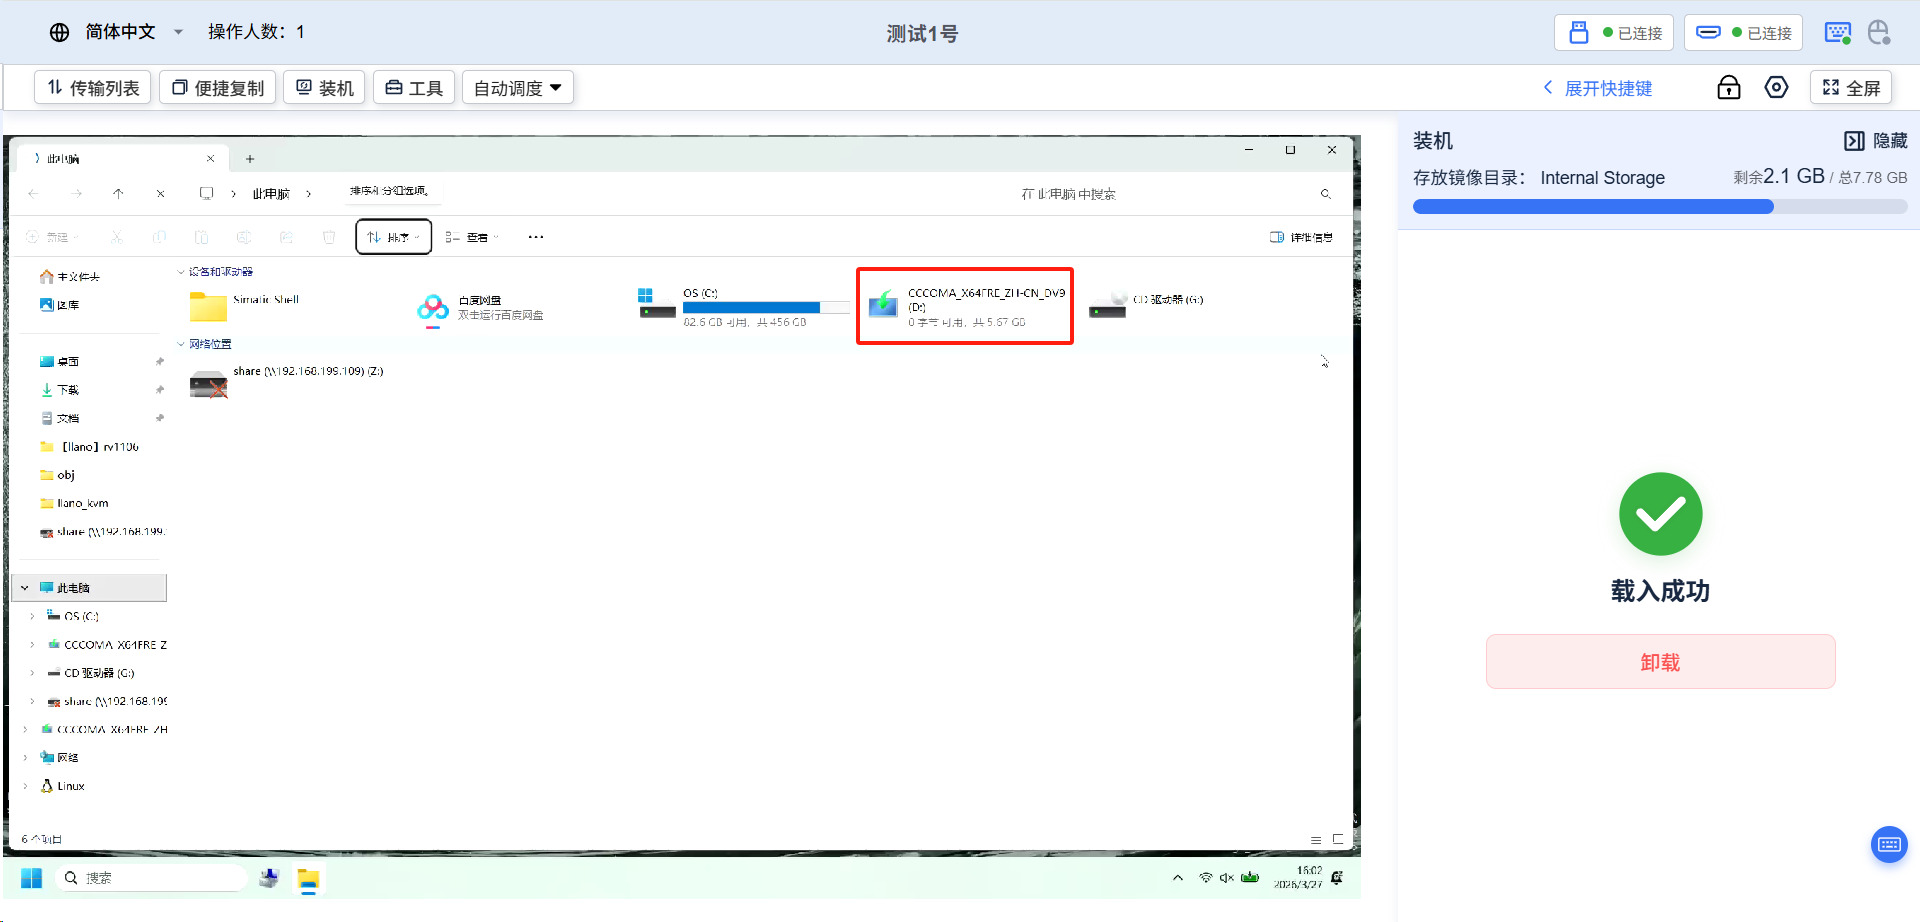
Load the image to the target device.
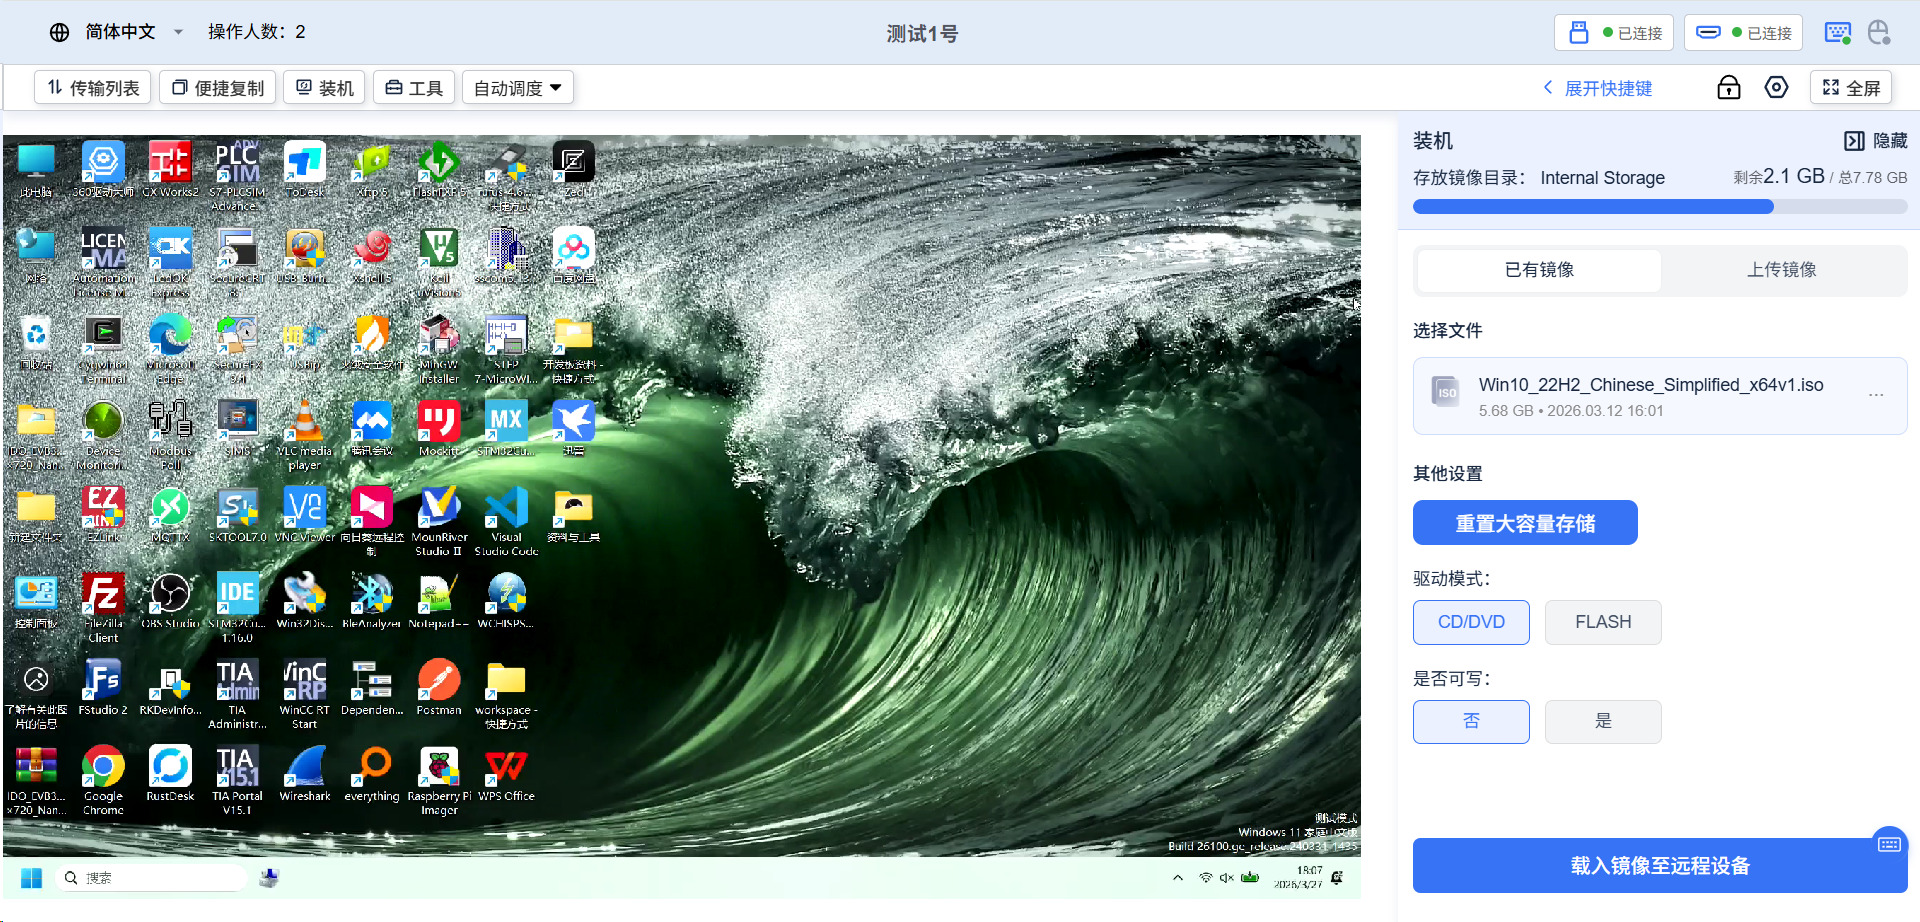
Once loaded successfully, the corresponding image drive will appear on the remote desktop.
3.3.3 Enter Target Device BIOS/UEFI to Set Boot Priority and Reinstall
The method to enter BIOS varies depending on the target hardware. Proceed according to the specific device's instructions.
3.4 File Transfer
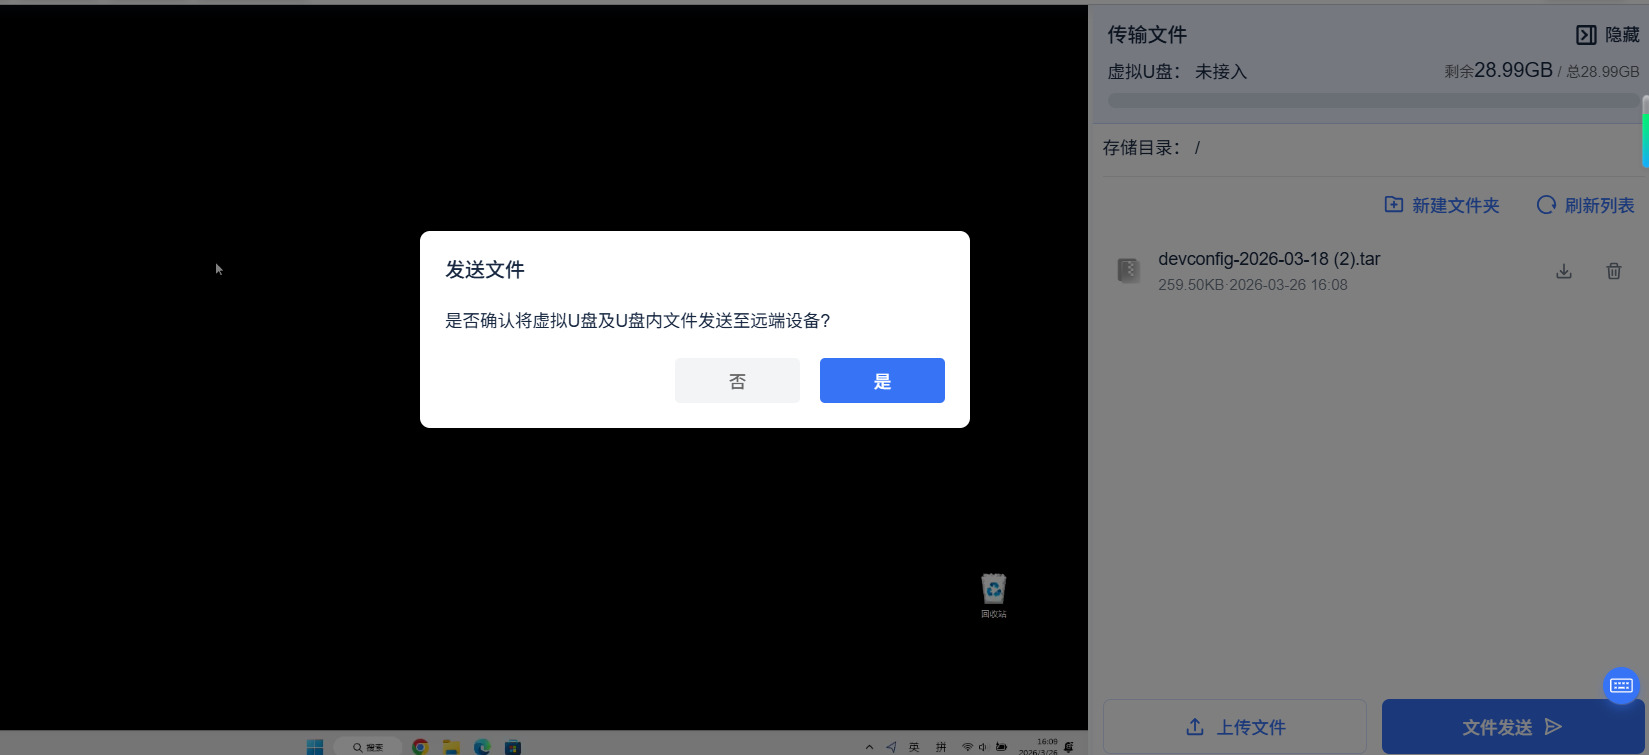
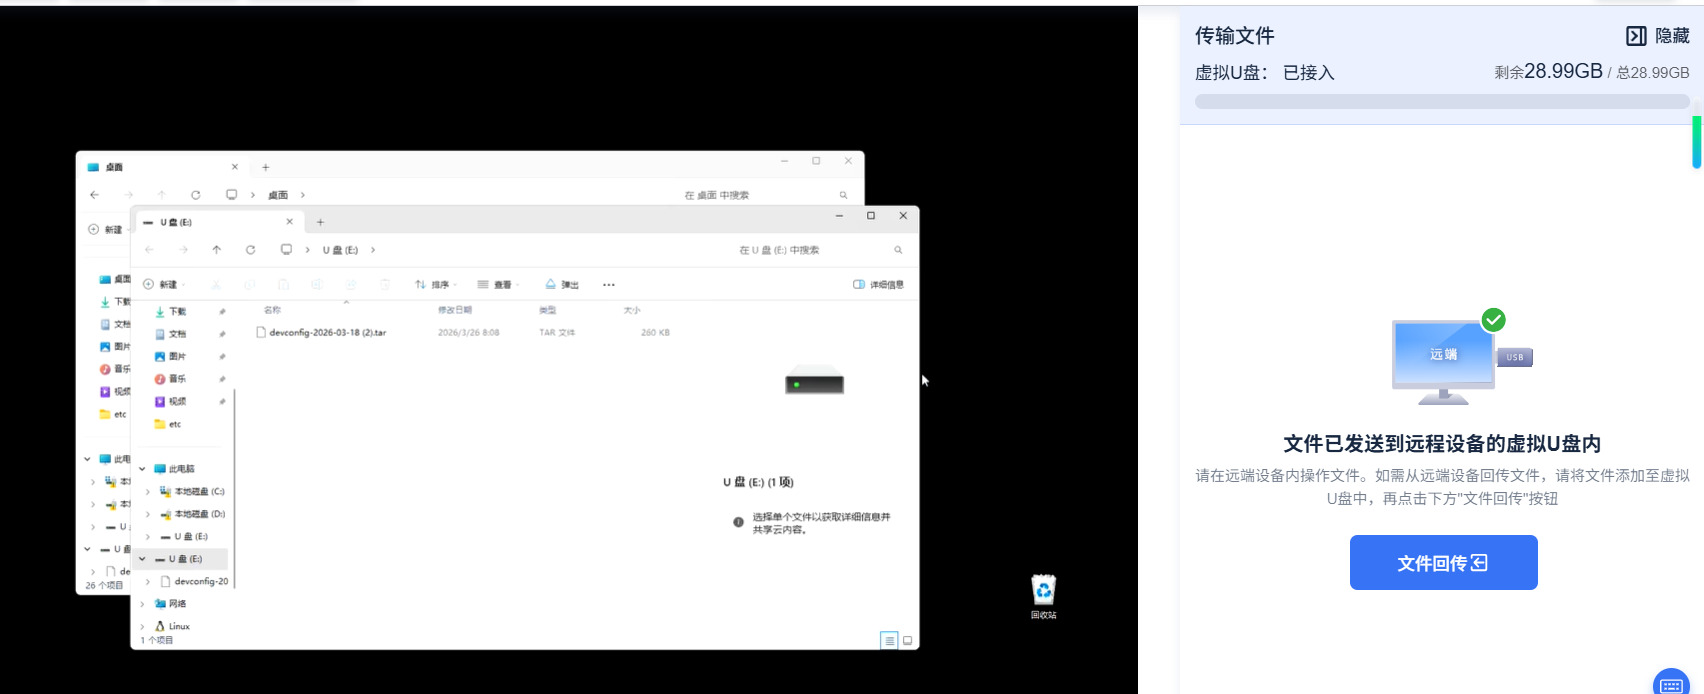
3.4.1 Upload Files from Local to Target Device

3.4.2 Download Files from Target Device to Local
3.5 Text Transfer (Clipboard)
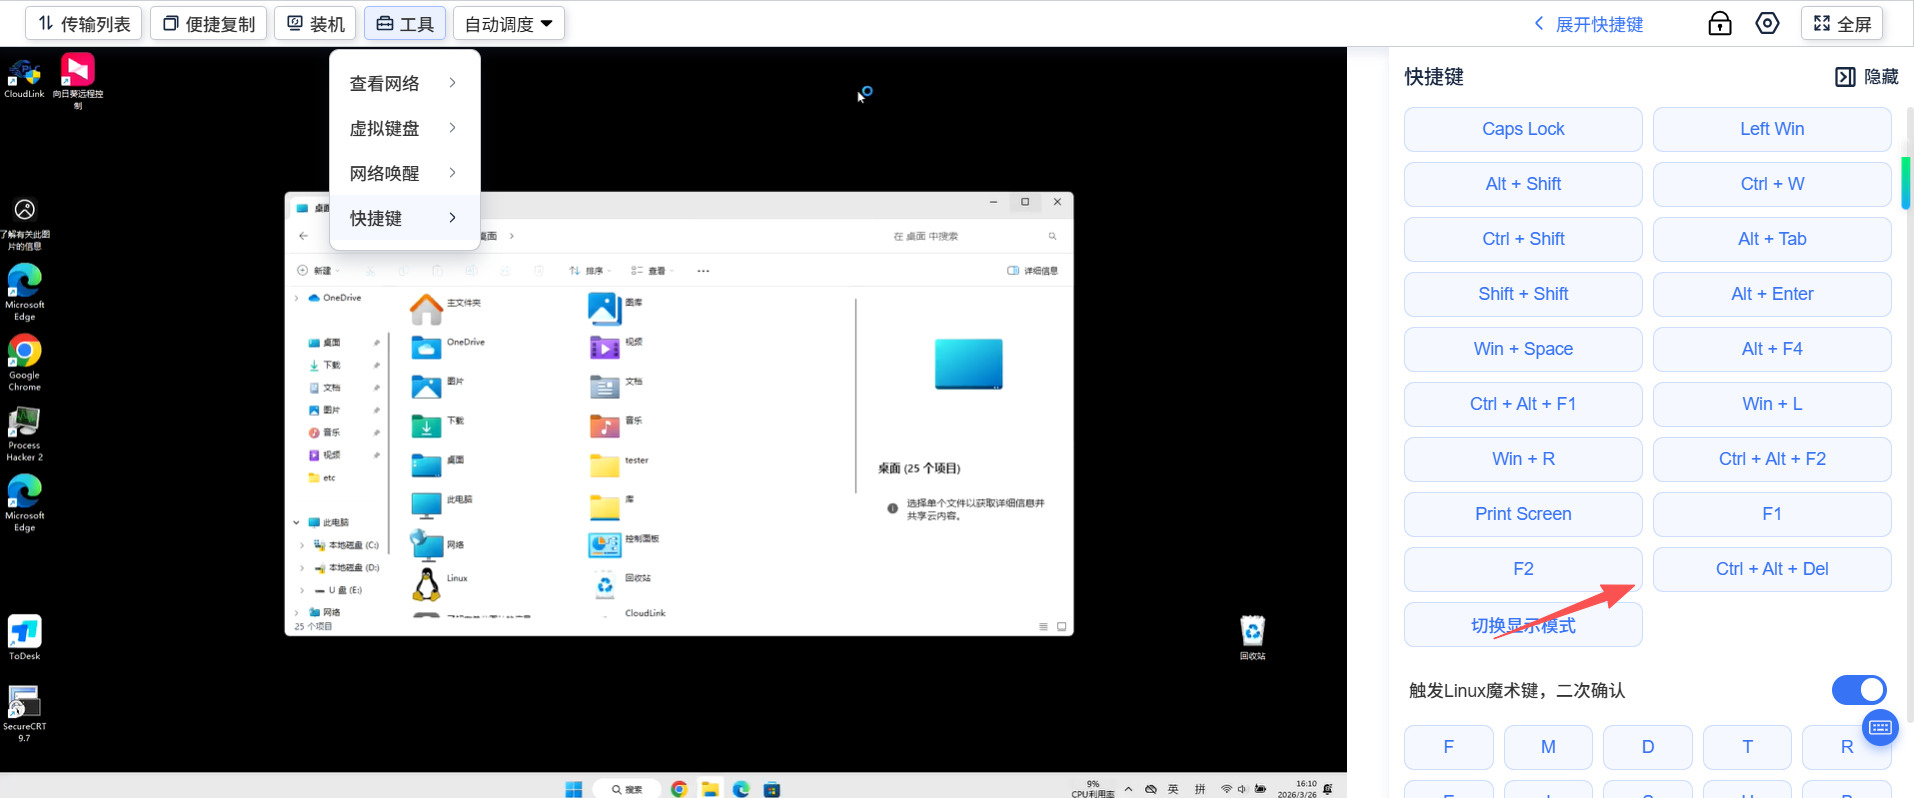
3.5.1 Send Special Keystrokes (e.g., Ctrl+Alt+Del)
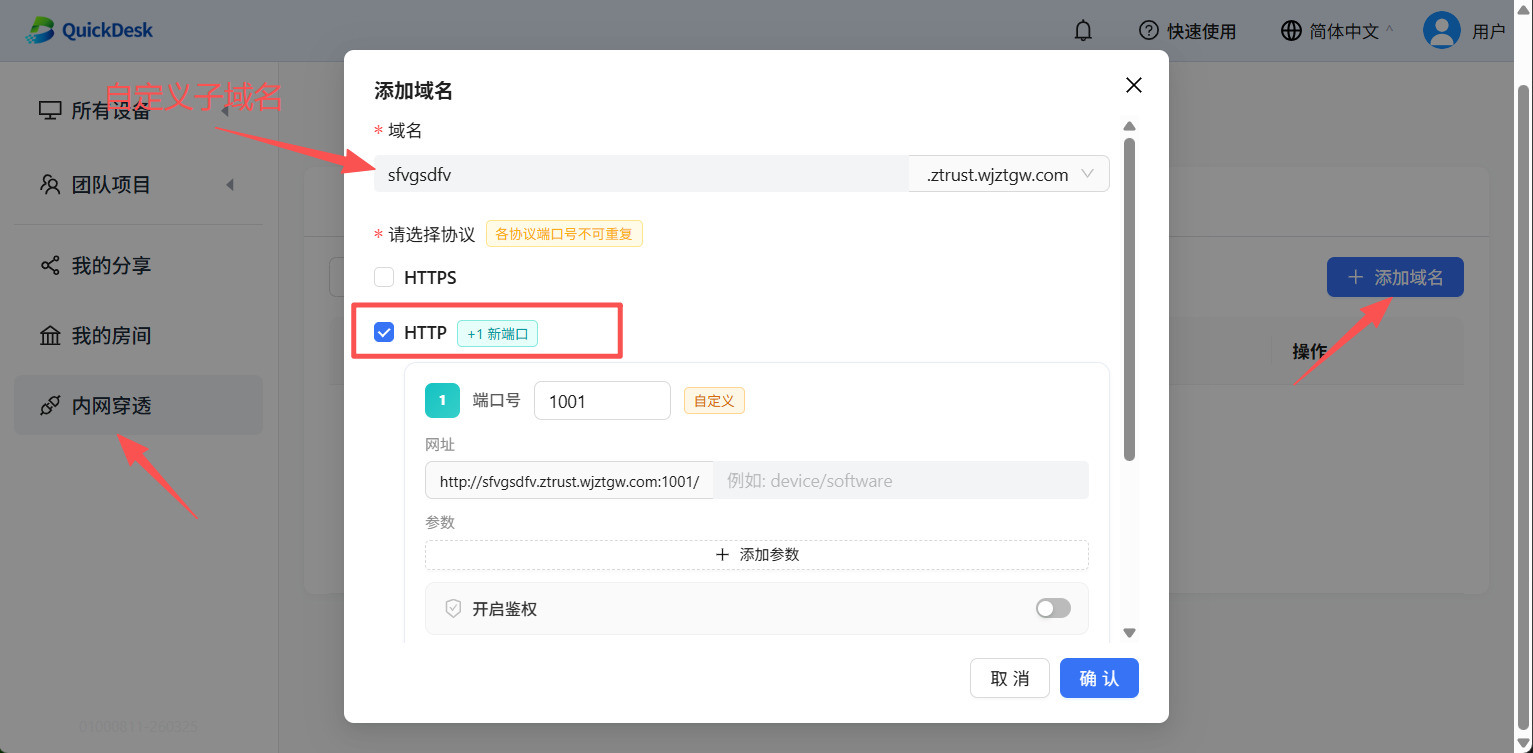
3.6 Network Tunnels and Jump Server Configuration
3.6.1 Establishing an Intranet Tunnel via SmartControl PRO
Example: Creating an HTTP tunnel.

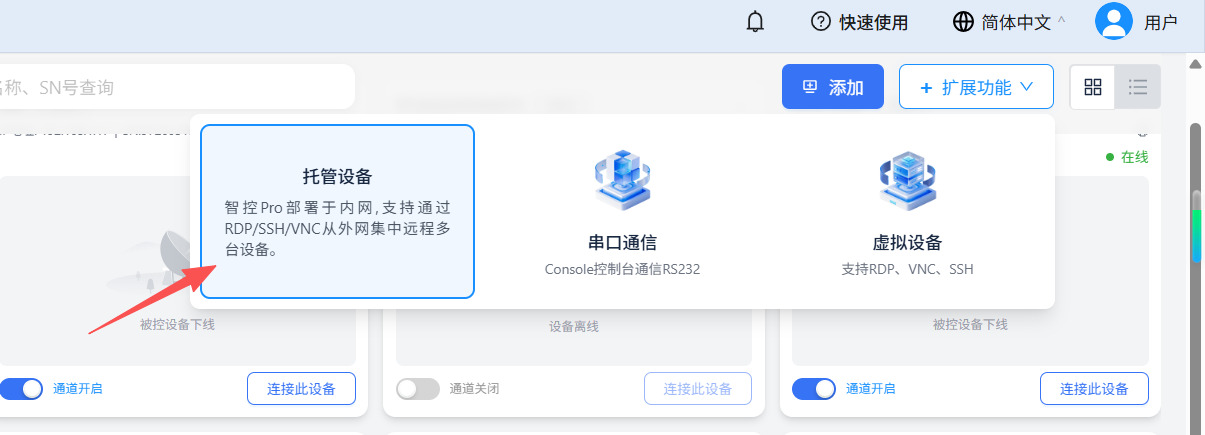
3.7 Multi-Protocol Remote Control: Centralized Management of RDP/VNC/SSH
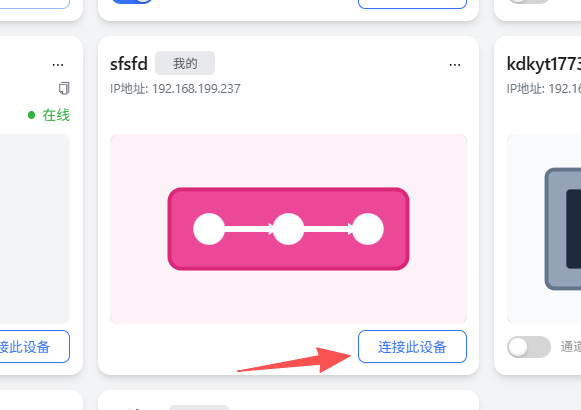
3.7.1 Establish and Access RDP/VNC Sessions
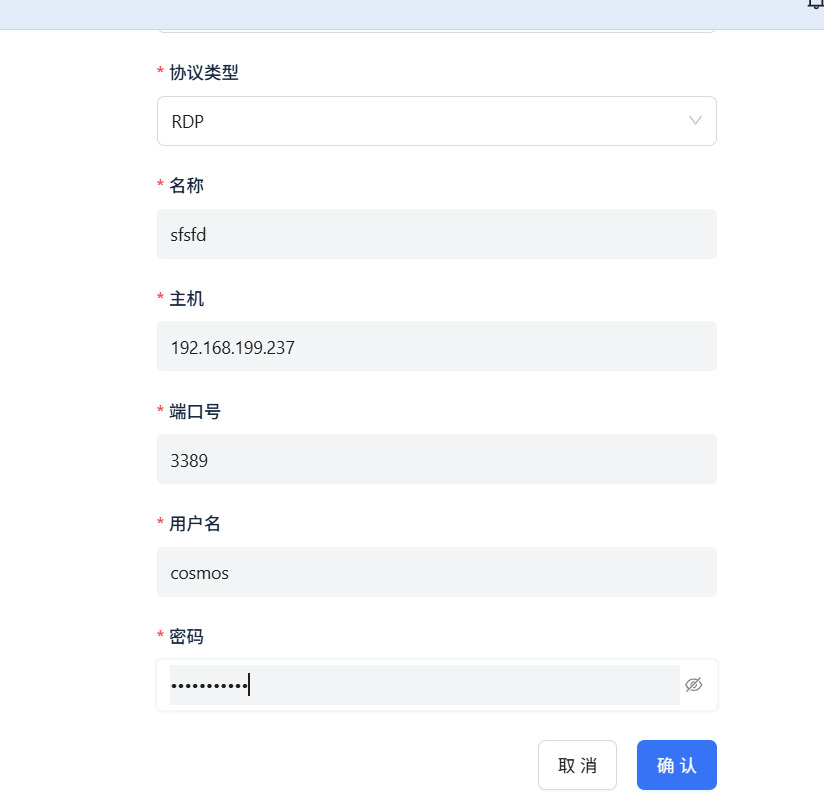
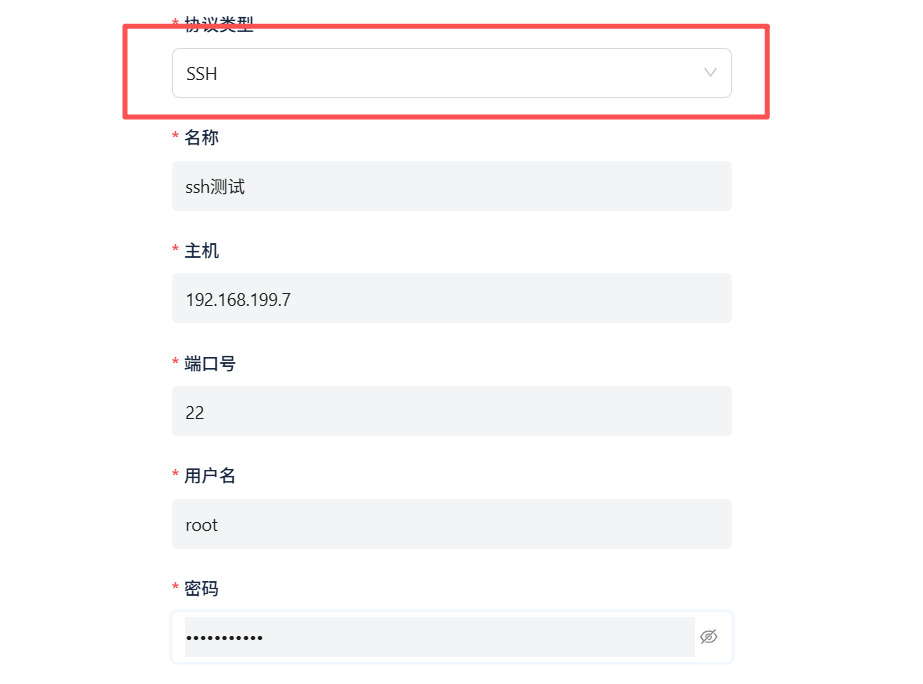
3.7.2 Initiate Secure SSH Terminal Connections for Underlying Maintenance
① The setup steps are identical to RDP, but the protocol type must be changed to SSH.
3.8 Remote Switch Initialization and Maintenance
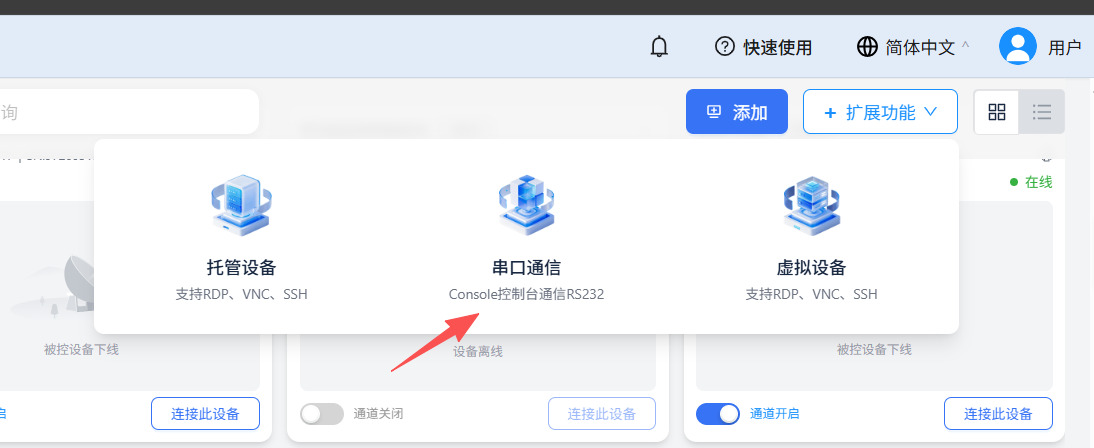
3.8.1 Direct Console Connection to Internal Switches via RS232/485
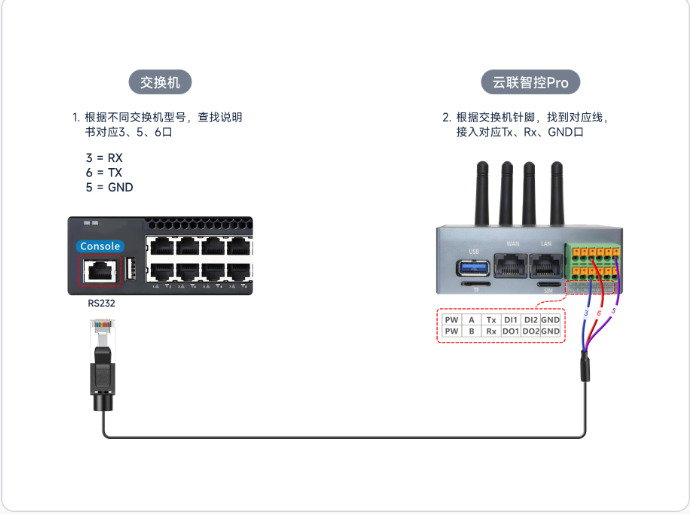
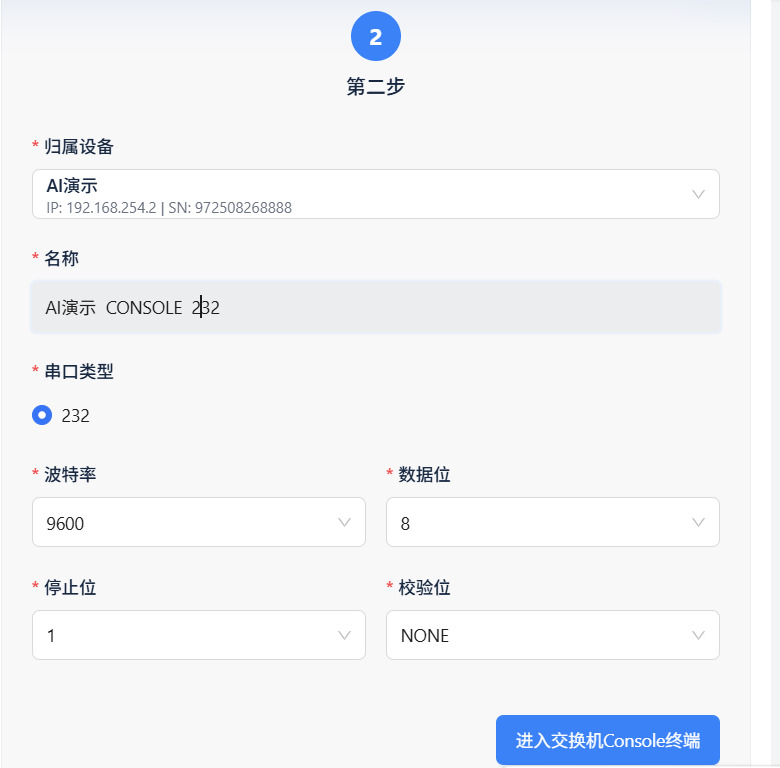
① Once physical wiring is complete, click "Enter Switch Console Terminal" to establish the connection.
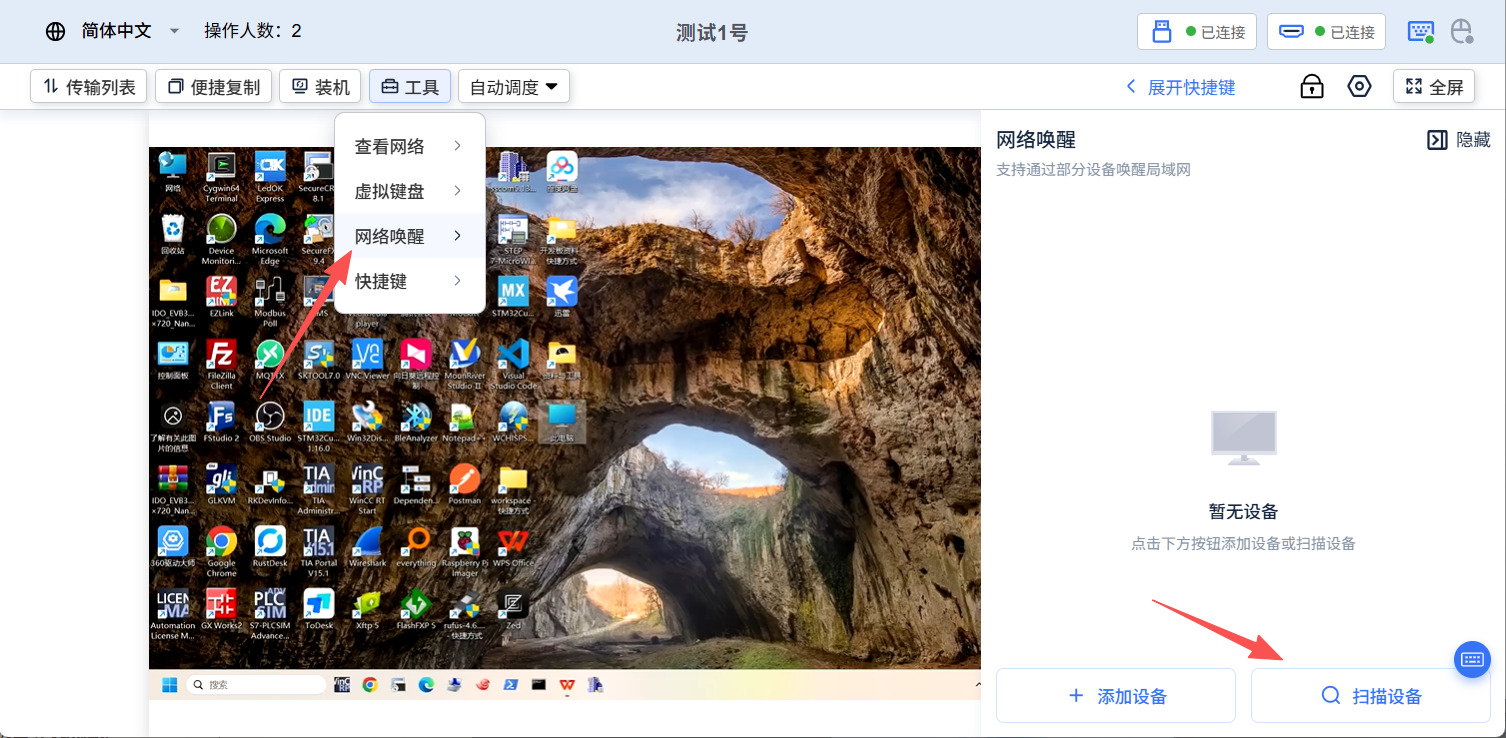
3.9 Wake-on-LAN (WoL)
3.9.1 Configure Target Host MAC Address or Scan Devices
3.10 Cloud Monitor Room / View-Only Sharing
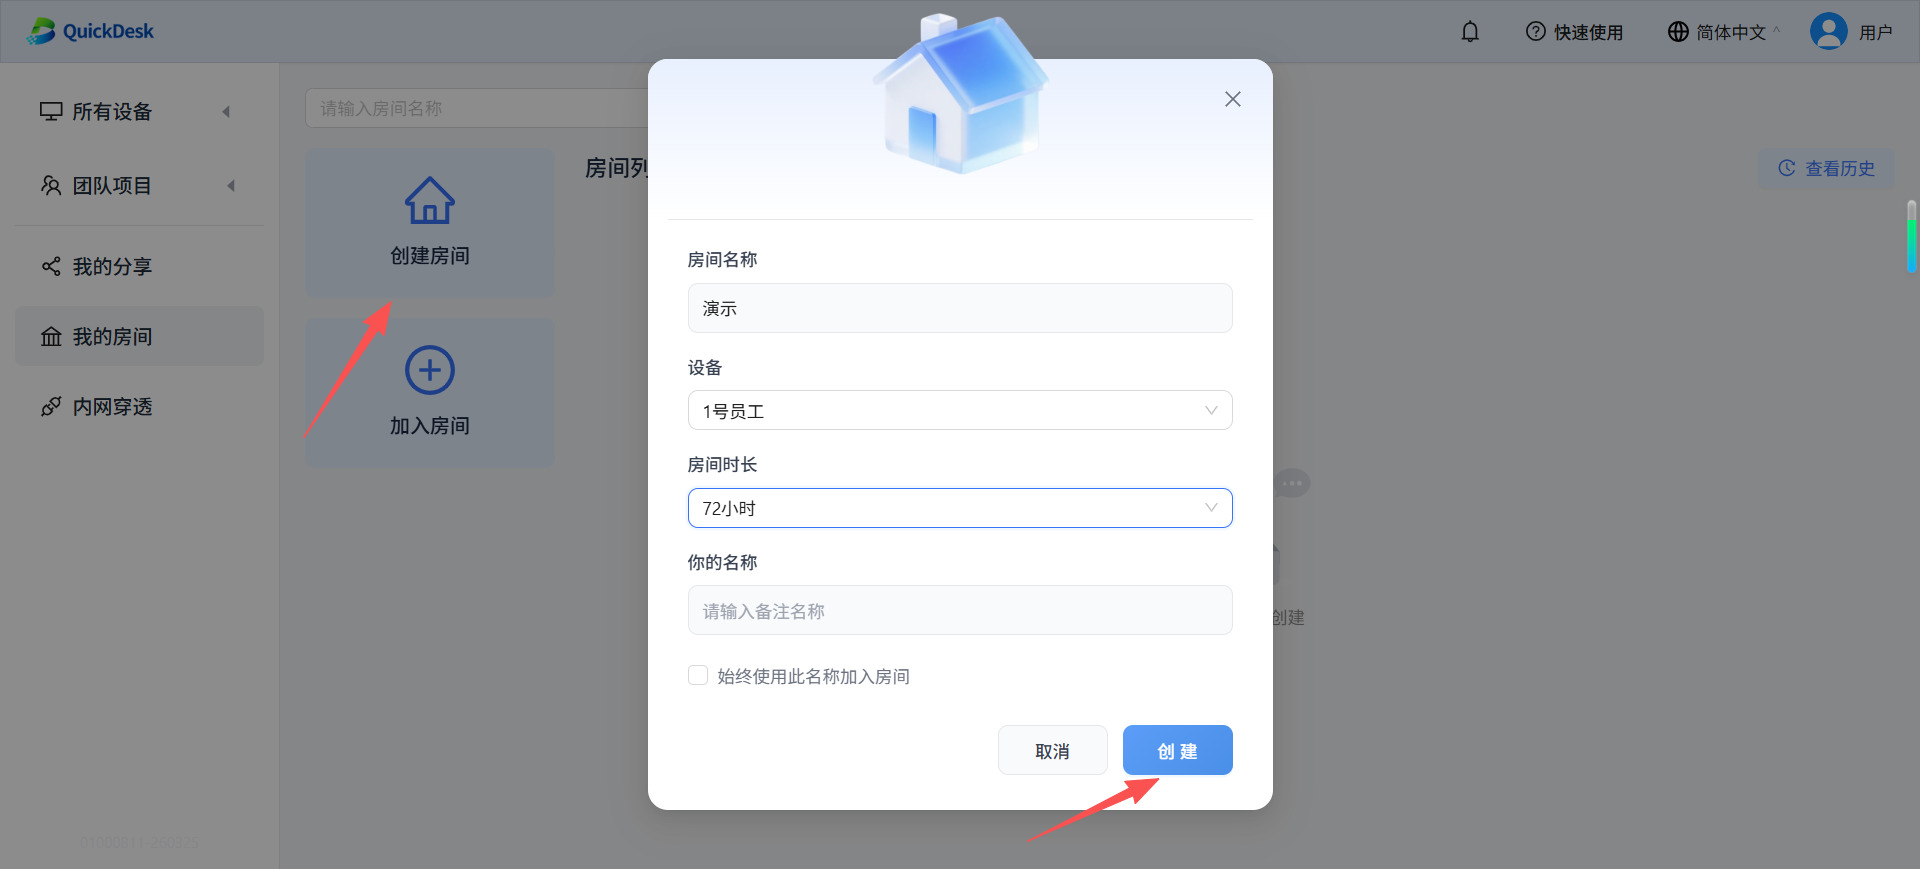
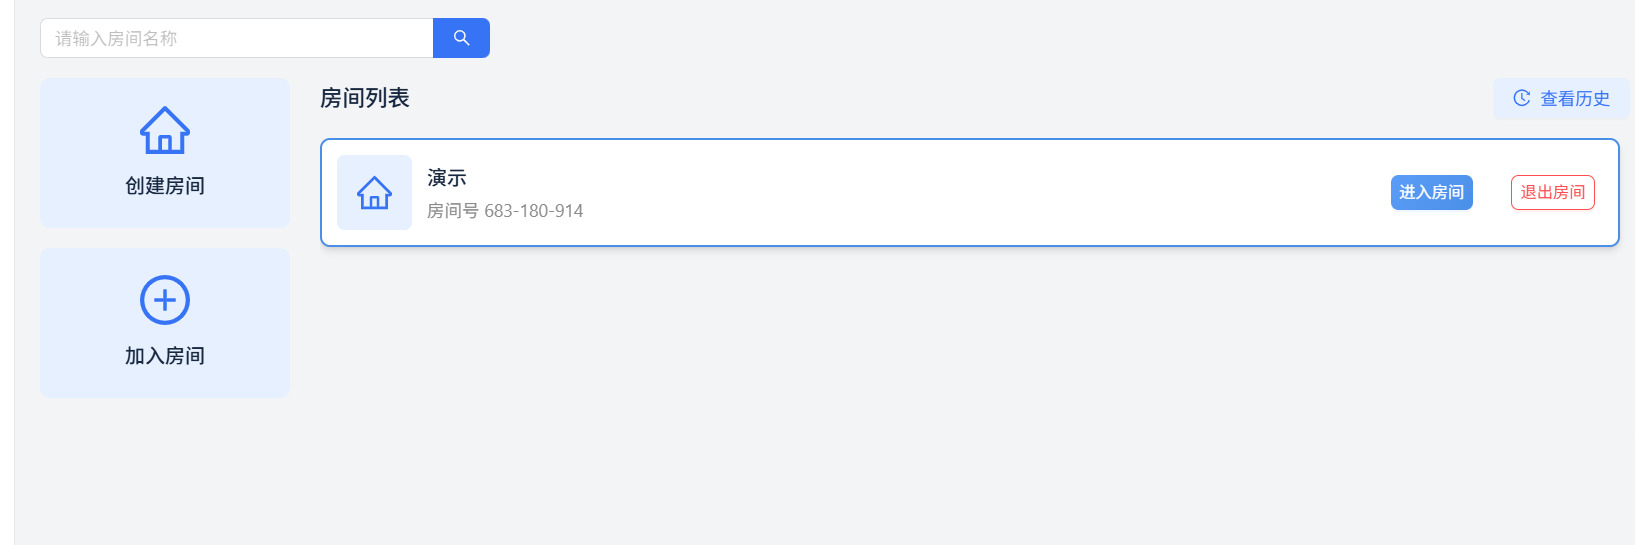
3.10.1 Create an Observation Room: Video Stream Only, No Control
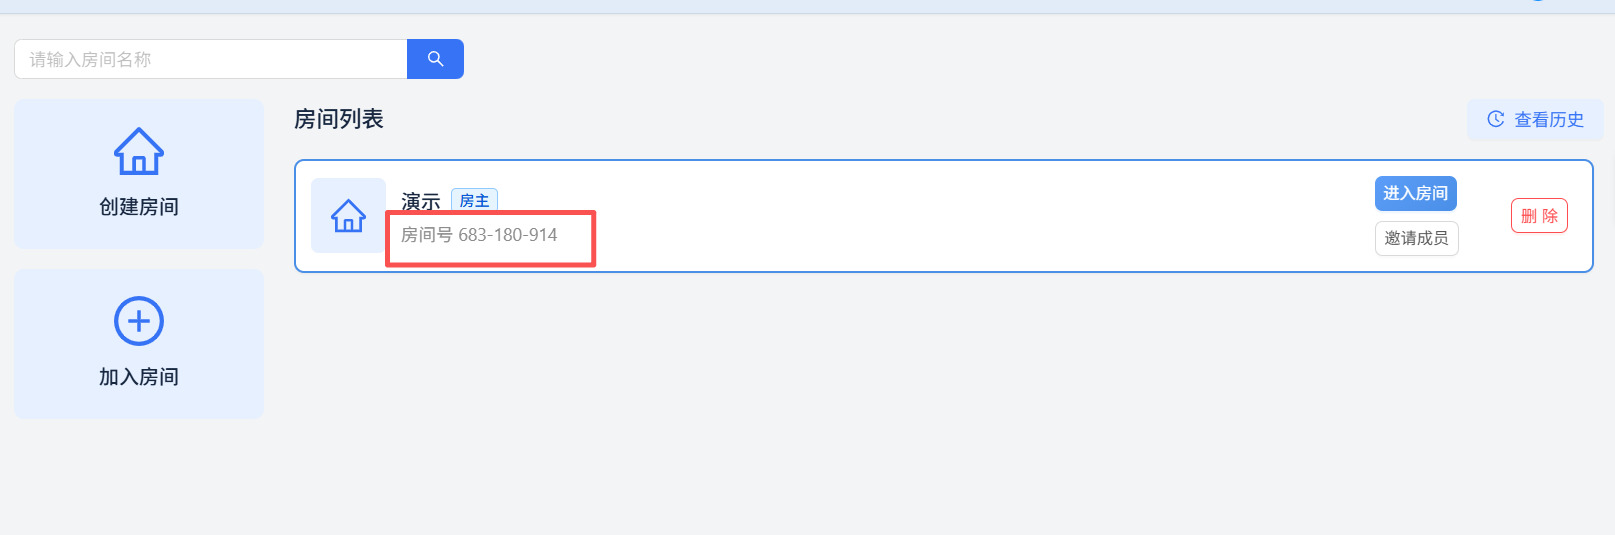
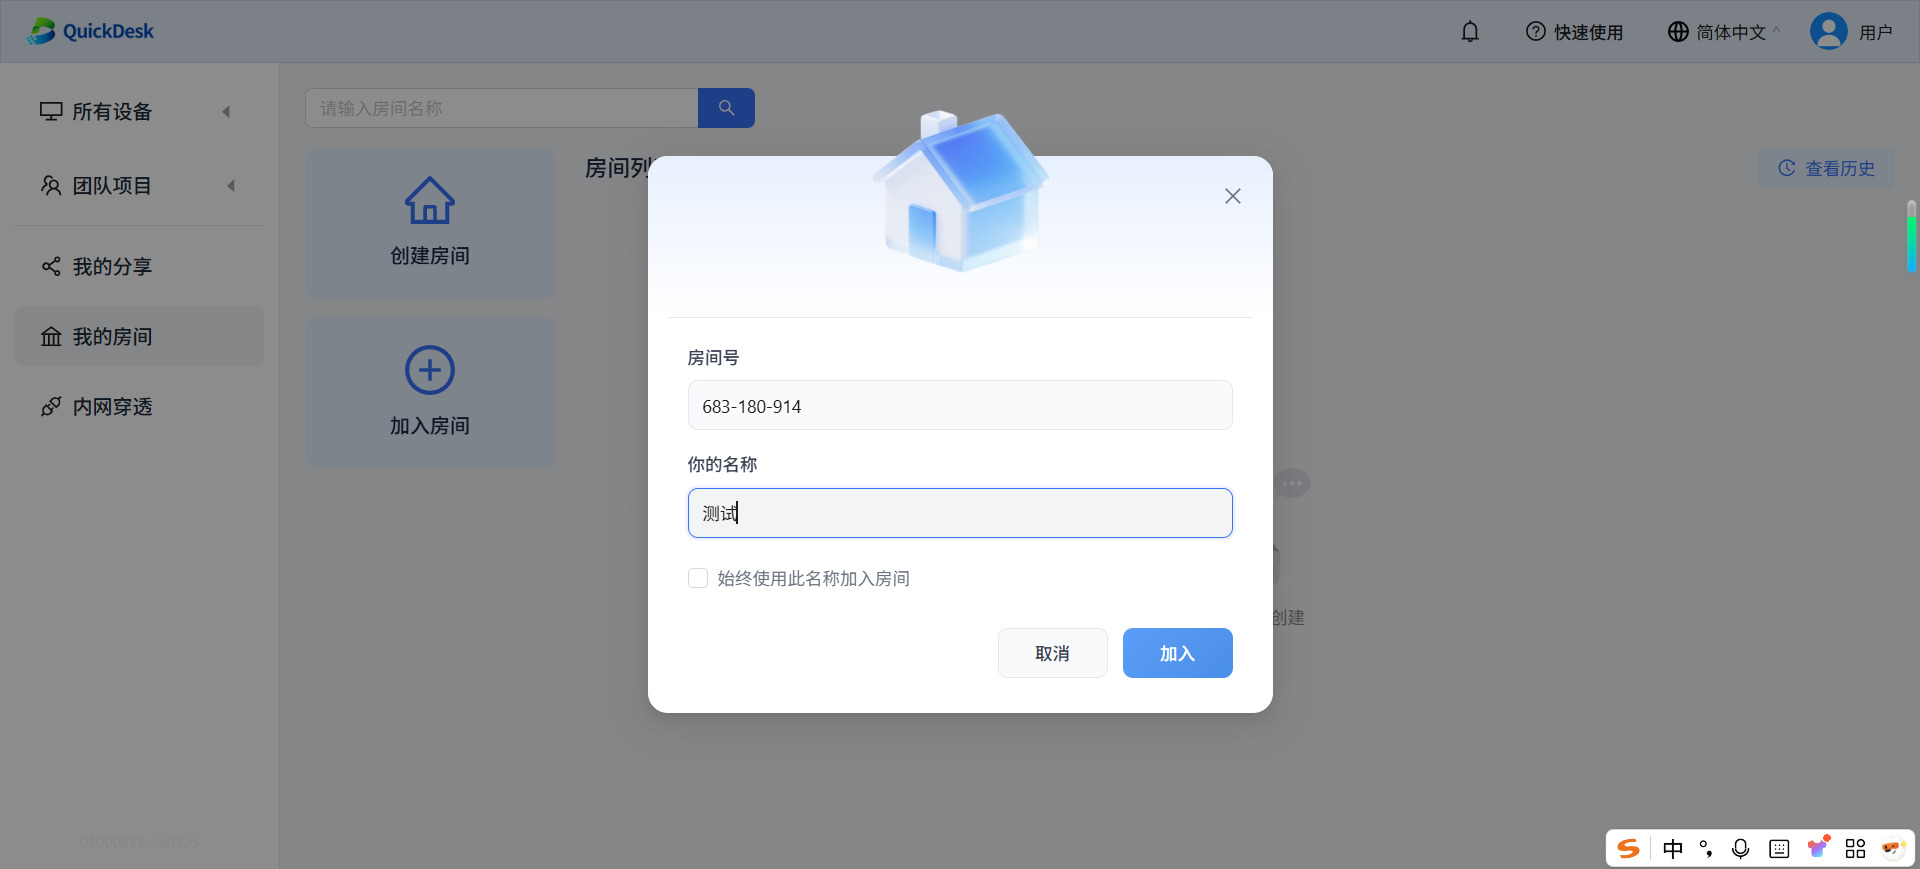
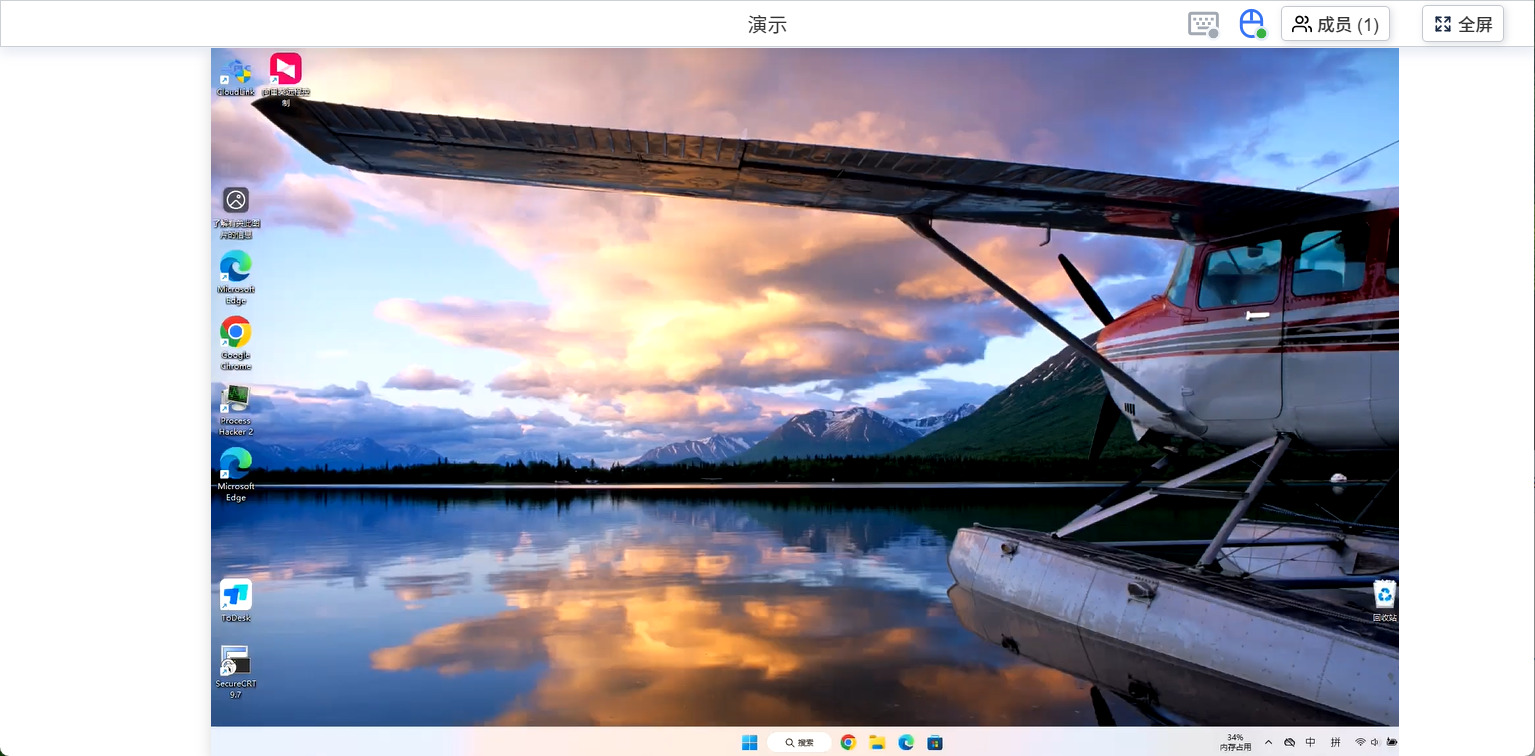
3.10.2 Join the Room and View the Demonstration
4. QuickDesk Advanced Management: Device Administration, Sharing, and Collaboration
4.1 Granular Device Management
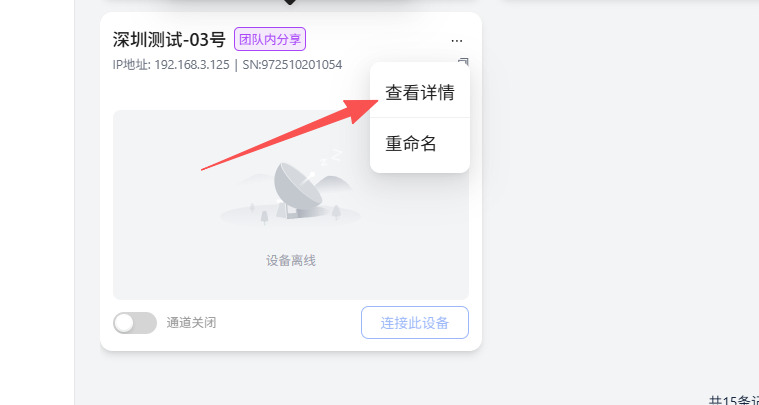
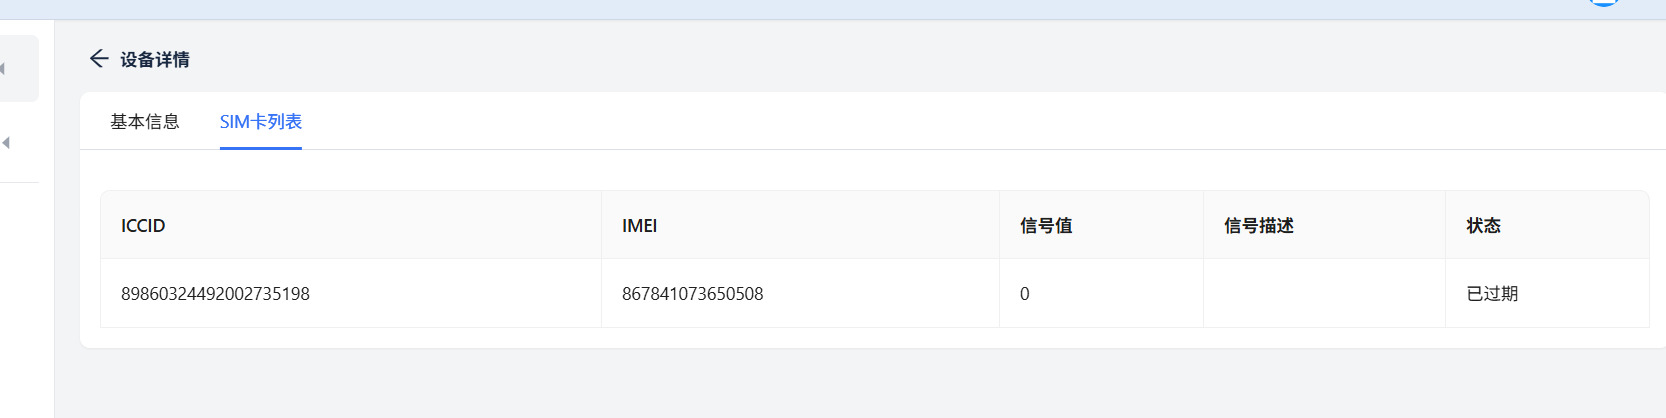
4.1.1 View Device Details and SIM Card Status
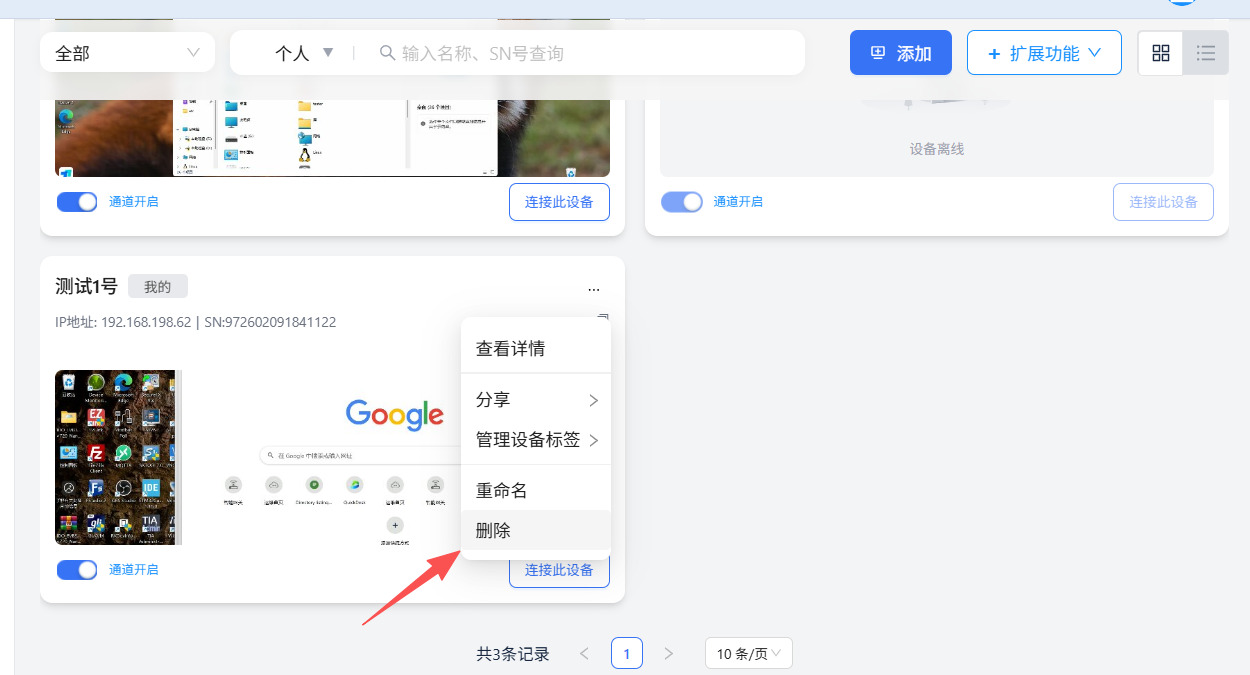
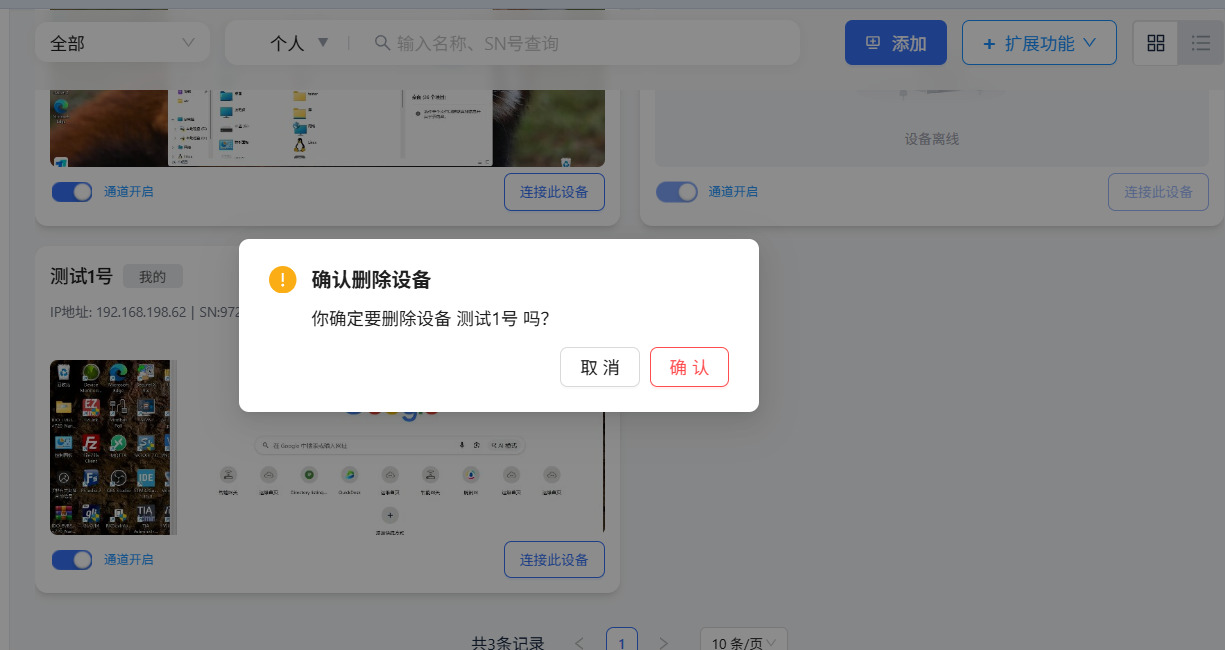
4.1.2 Remove QuickDesk Device (Unbind hardware for reallocation)
4.1.3 Advanced System Control: Reboot Device, Reset OTG, and Clear Wi-Fi
4.2 Device Sharing Mechanisms and Permission Center
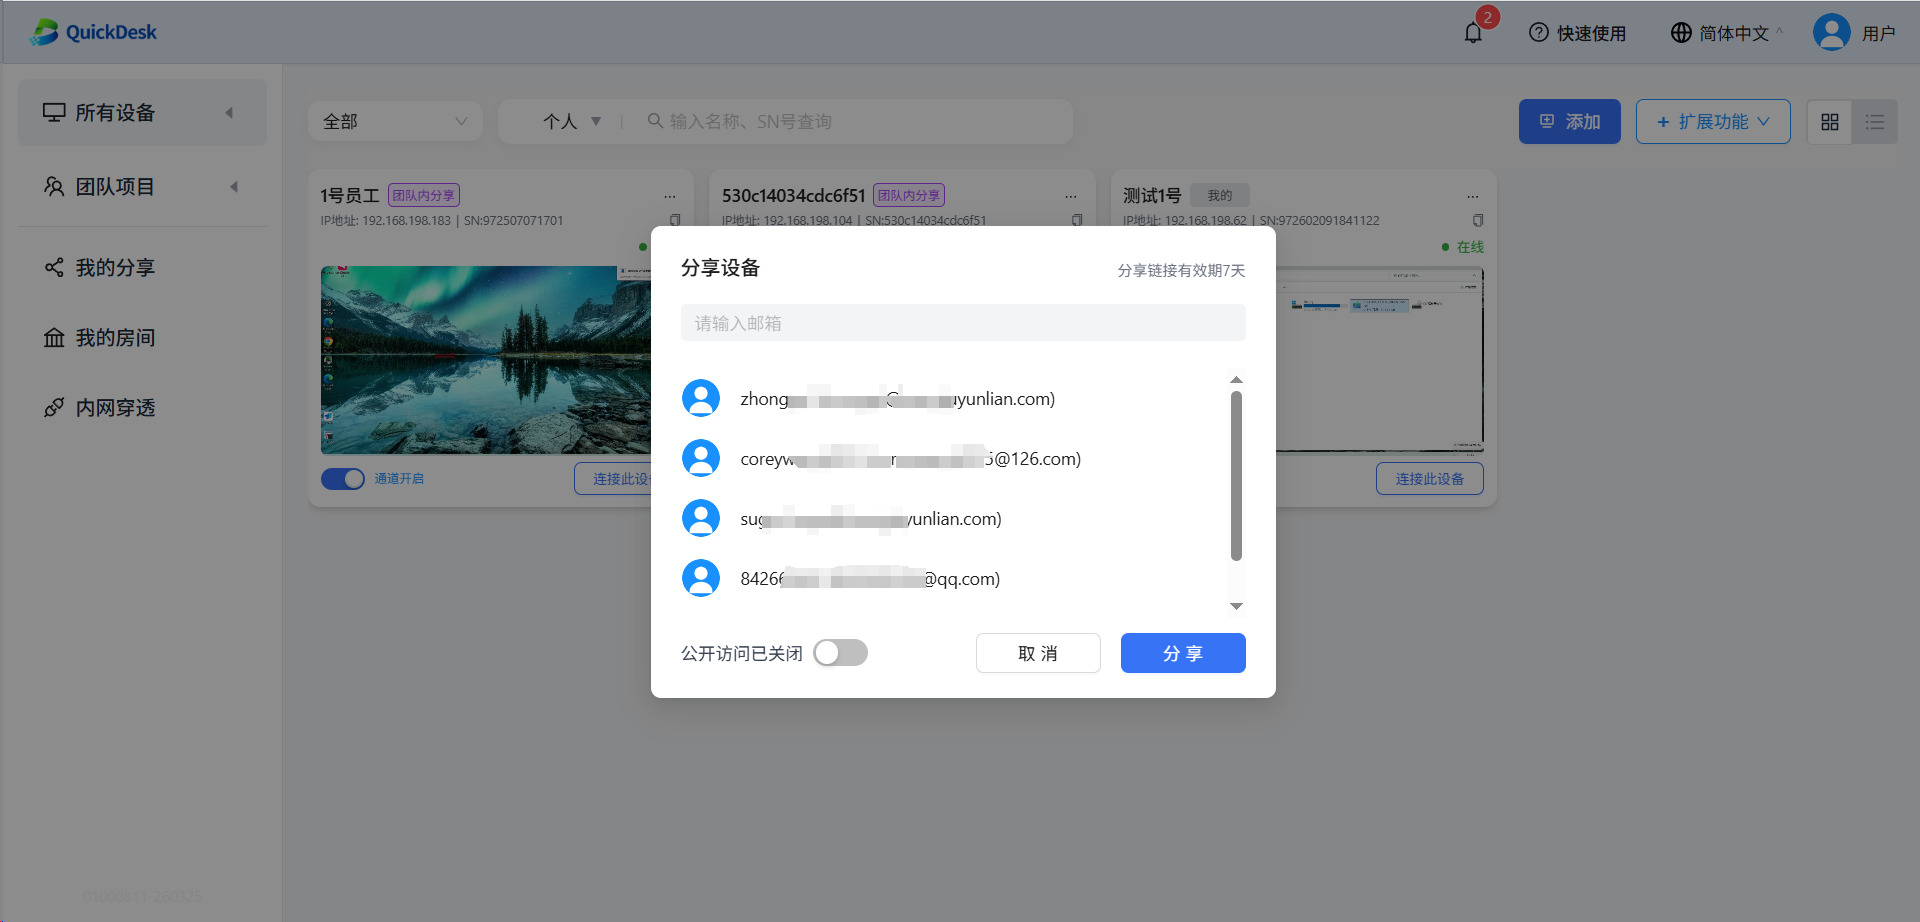
4.2.1 Share with Specific Users
Enable remote control for designated personnel by sharing the device.
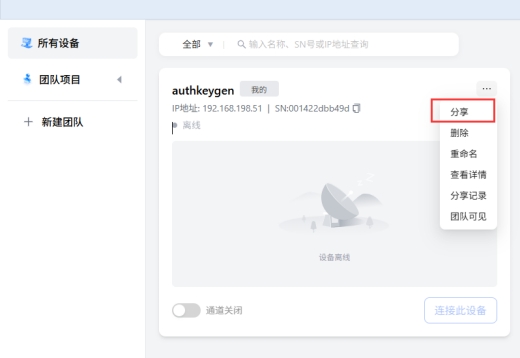
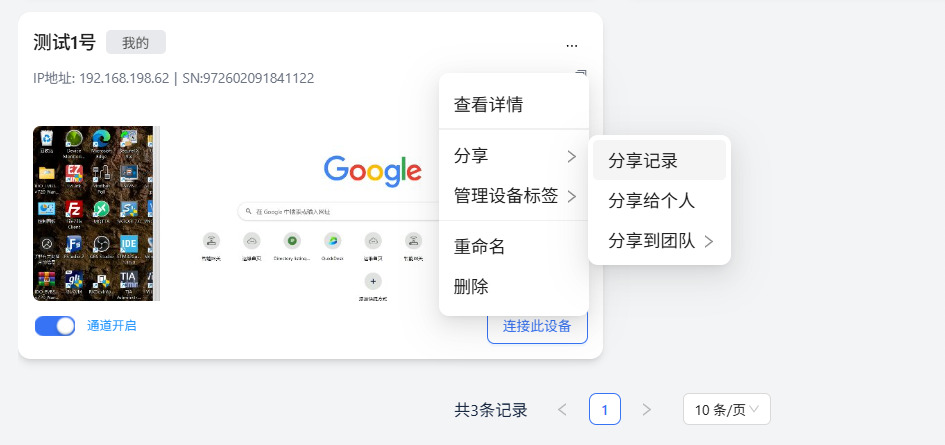
Click the "Details" button in the upper right corner of the device card, then click "Share". Enter the recipient's email address.

Input the email.

Copy the generated text and send it to the intended recipient via chat/email.

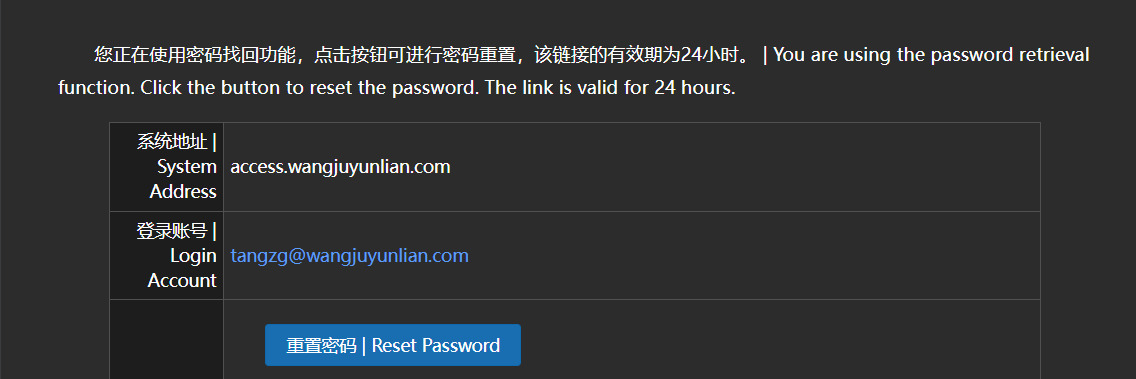
When the recipient clicks the link, they will see the following prompt:

Click "Accept Share" to begin utilizing the remote functions.

4.2.2 Public Sharing for General Scenarios
Check the "Public Access" option. An email address is not required.
Enter the sharing details as needed.
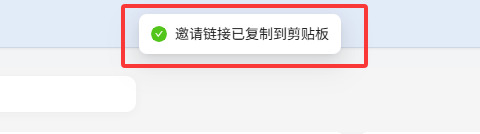
Copy the generated text and share it.

Recipient view upon clicking the link:
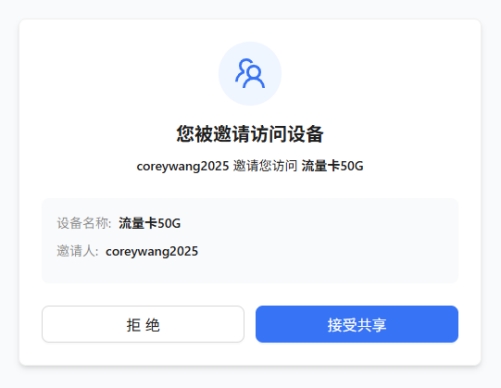
Click "Accept Share" to access the device.
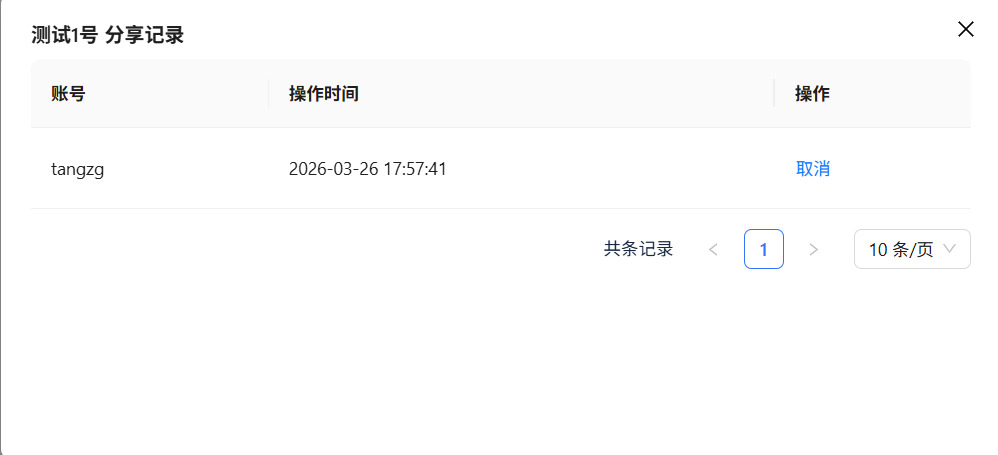
4.2.3 My Sharing History and Permission Management
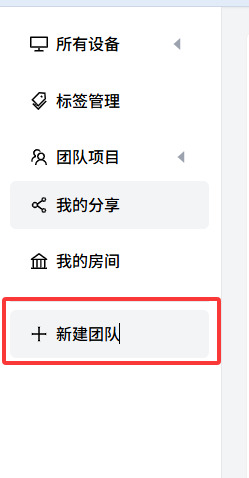
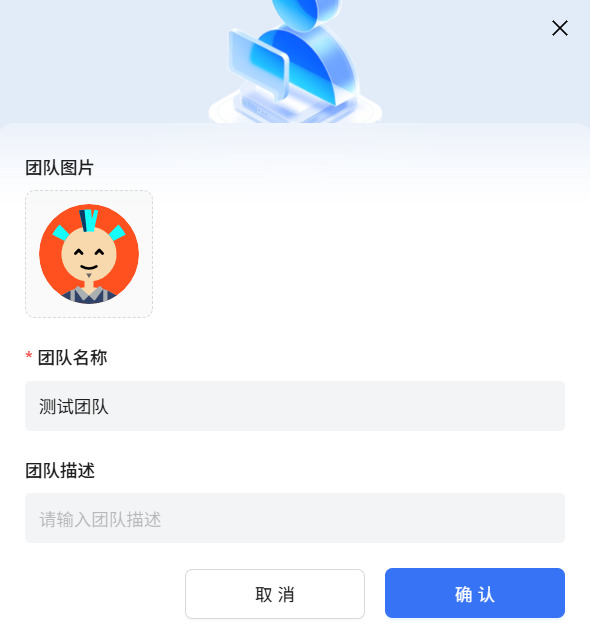
4.3 Team Creation and Enterprise Resource Pools
4.3.1 Team Initialization: Create Team, Modify Settings, and Avatar
4.3.2 Team Expansion: Invite New Members
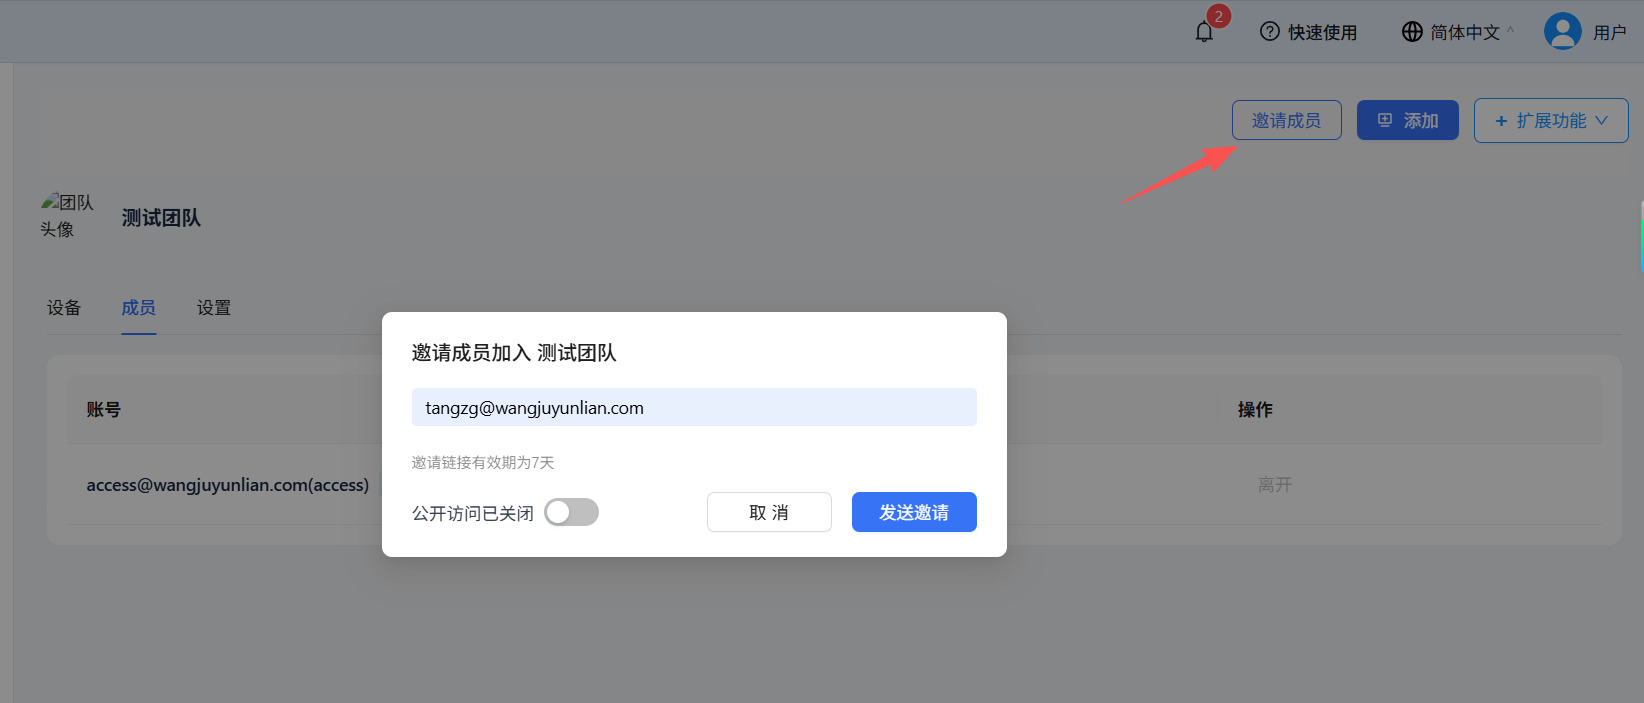
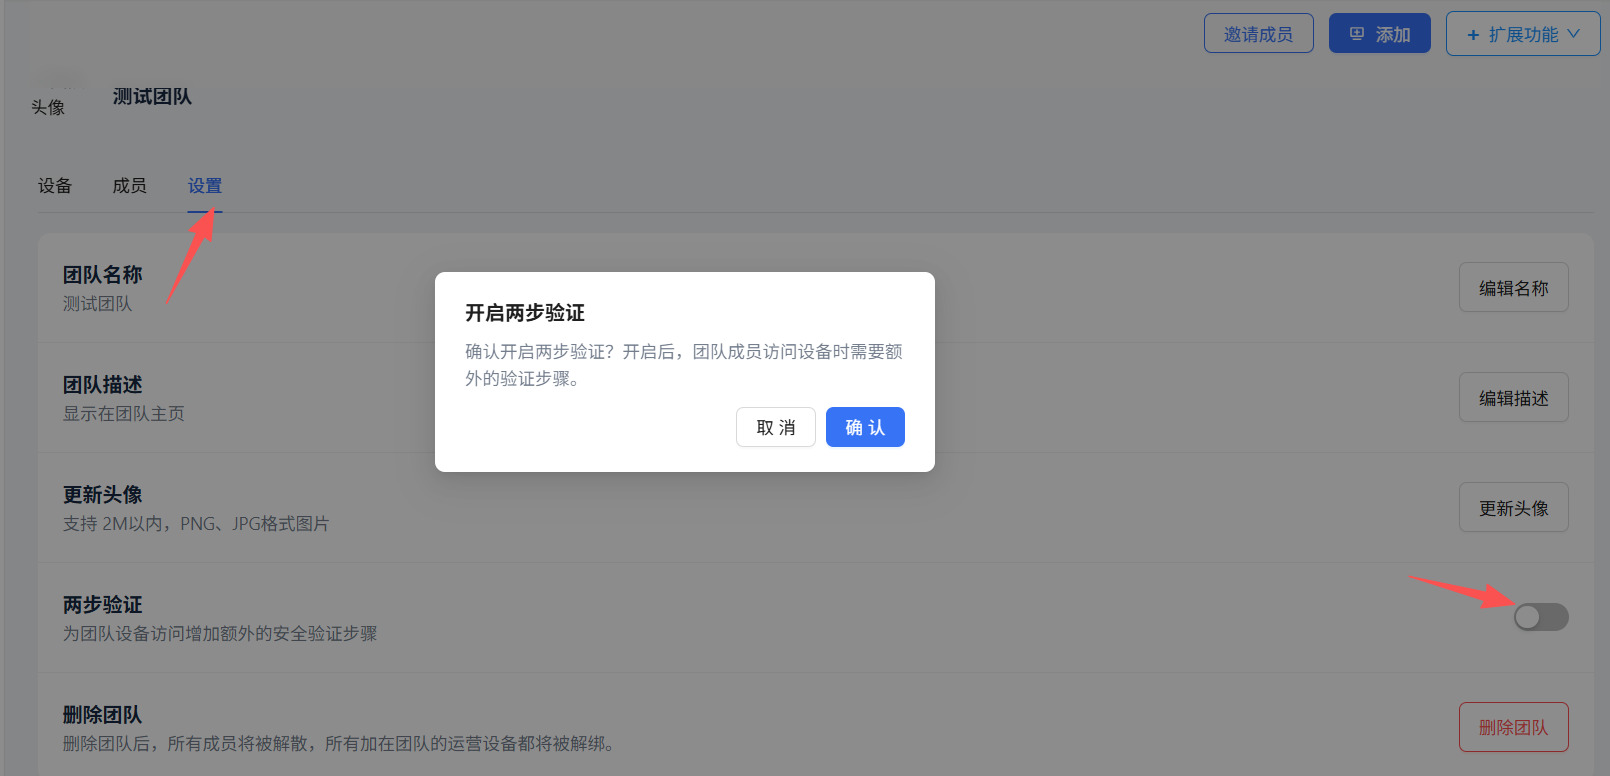
4.3.3 Team Security Baseline: Enforce Two-Step Verification (2FA)
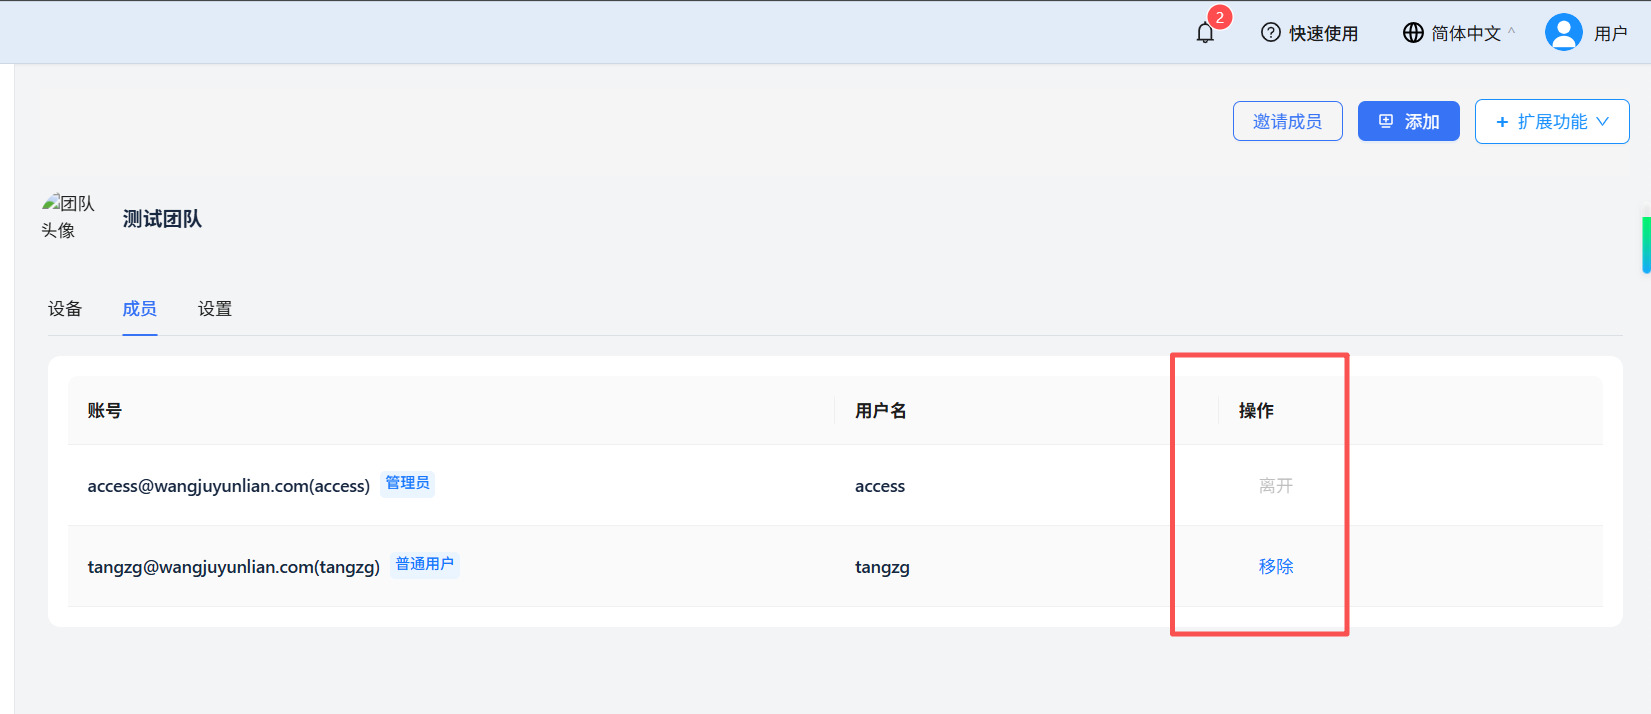
4.3.4 Personnel Management: Remove Members
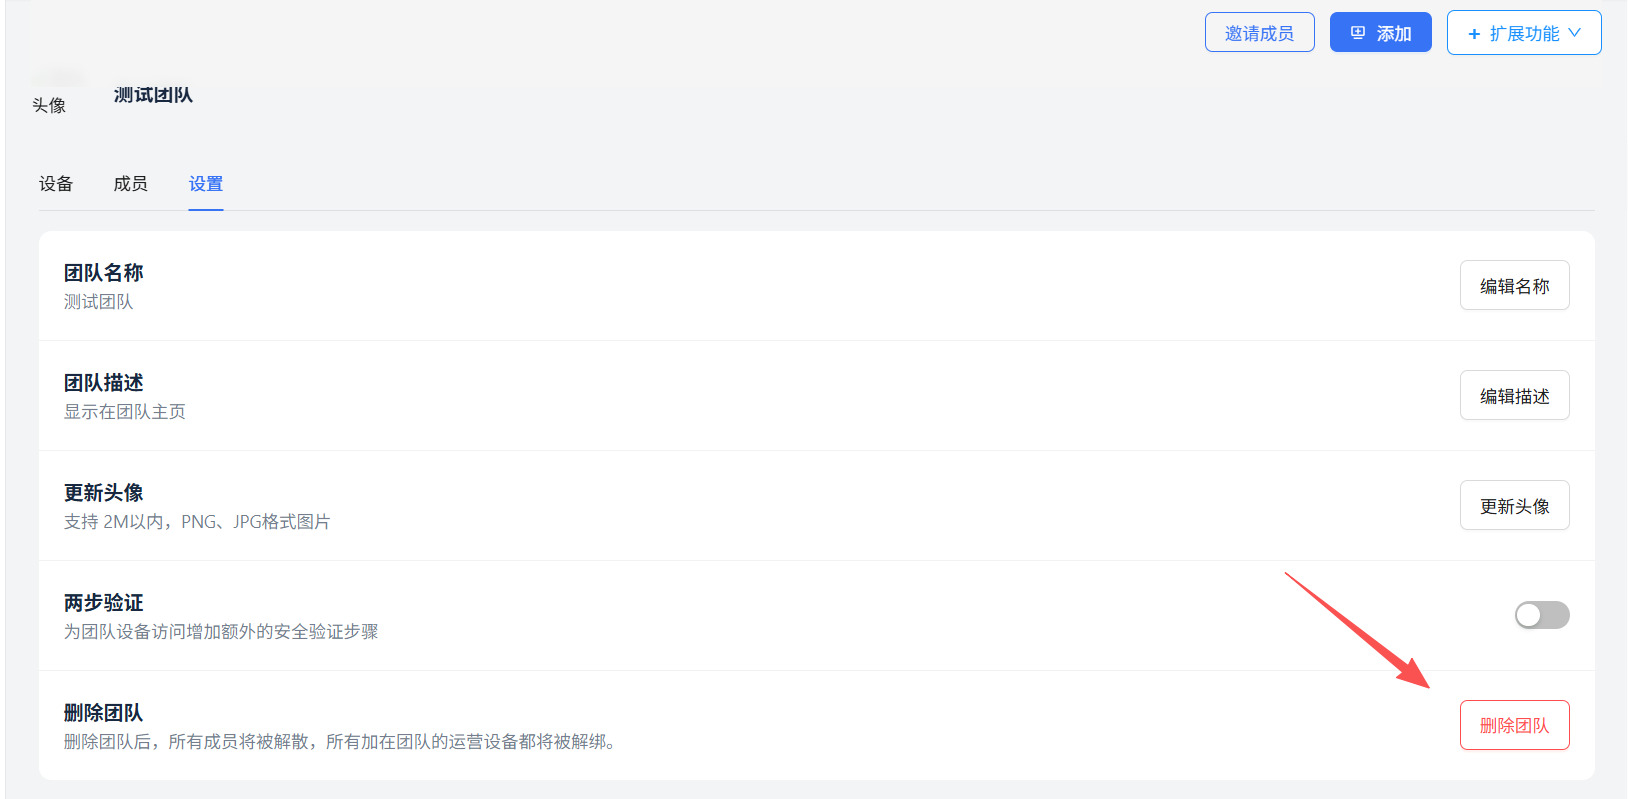
4.3.5 Asset Handover: Disband and Delete Teams
5. Advanced Console Configuration and Display Tuning
5.1 Quality Tuning and Bandwidth Adaptation
5.1.1 Adjust Remote Video Resolution (Smooth / Standard / High / Ultra HD)
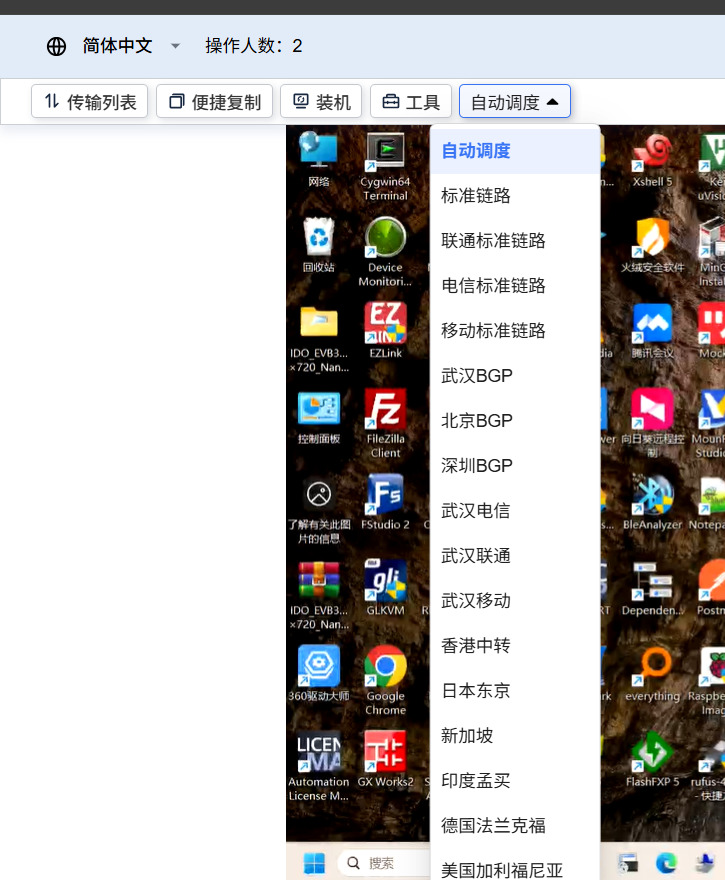
5.1.2 Link Node Switching (Smart Routing, ISP Selection, and BGP/Relay Node Options)
6. Troubleshooting and Maintenance
6.1 Cloud Connection and Device Offline Troubleshooting
6.1.1 Cloud Platform Shows Device as Offline
1) Check if the device is powered on
A normally booted device will display its IP address and SN on the OLED screen.
2) Check network connectivity
① A successfully connected device will show active network status on the screen.
② If the screen displays "Net Unavailable":
- For Wired (Ethernet): Ensure the cable is securely plugged in, port LEDs are flashing, and DHCP is enabled on the router.
- For 4G Cellular: Verify the SIM card is seated properly, active, and antennas are securely attached.
6.2 Blank Screen or Abnormal Signal on Remote Desktop
Enter the remote interface and verify that both USB and HDMI cables are securely connected.
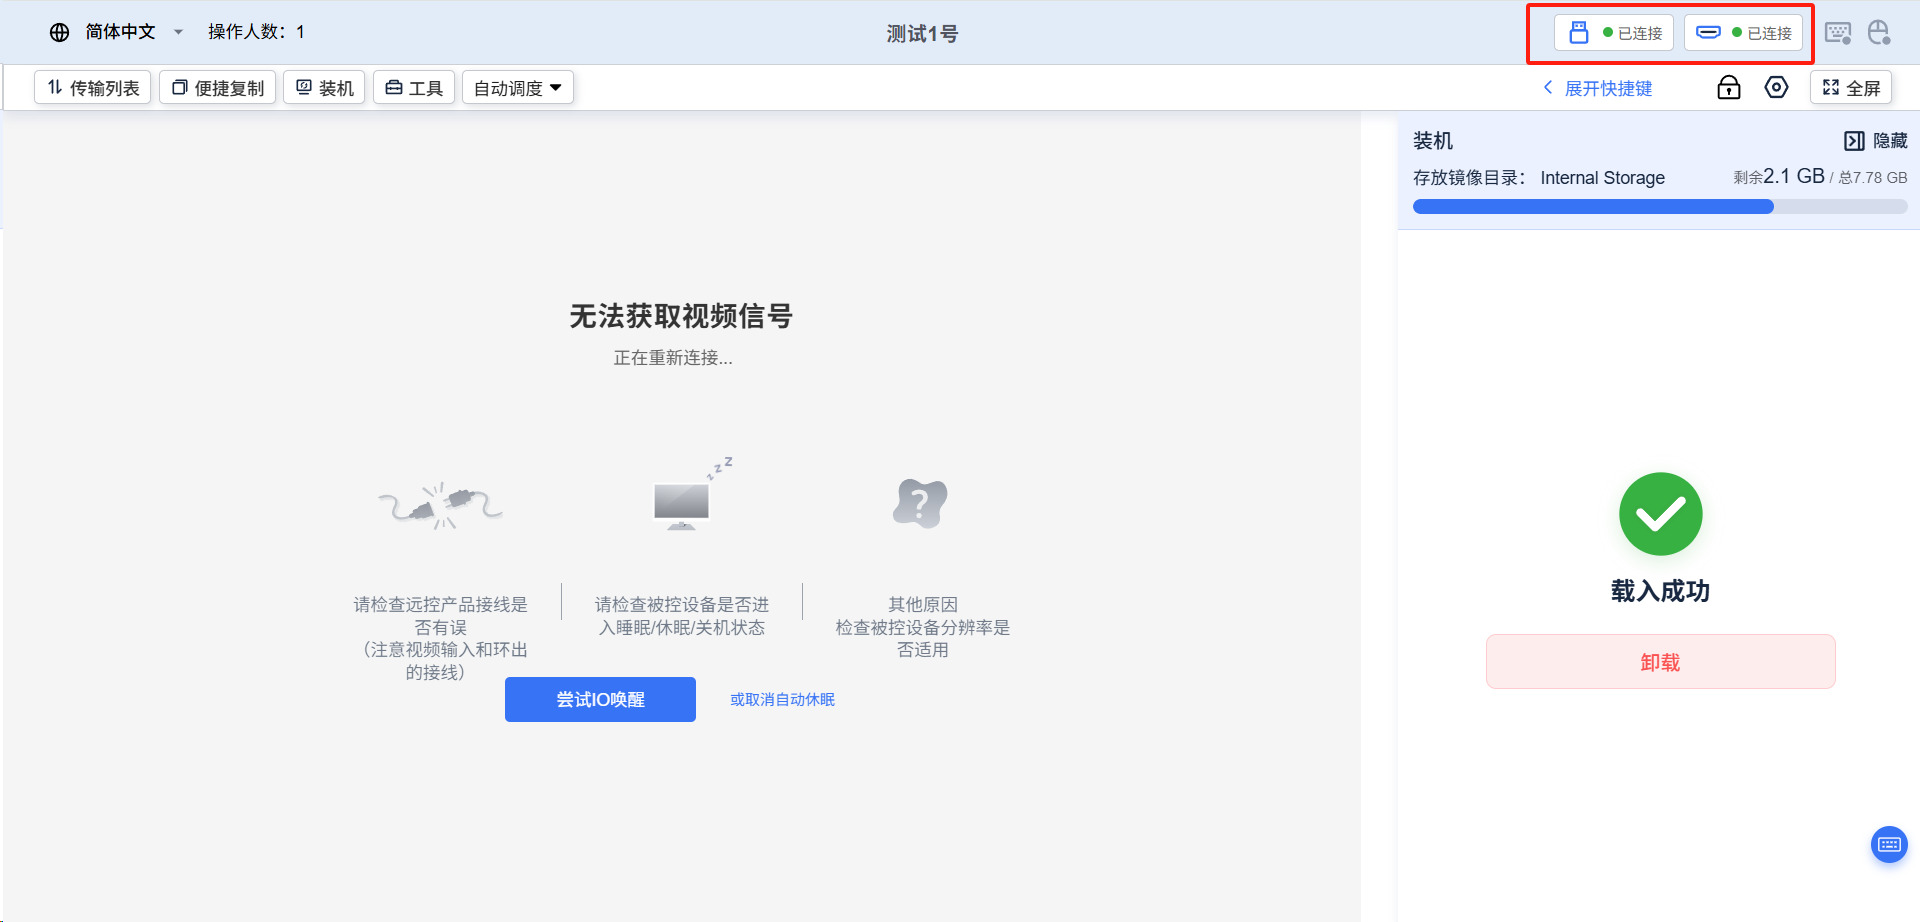
If connections are secure, the target host may be in sleep mode. Move your mouse within the remote interface to wake the device.
If the remote desktop still fails to display, return to the Cloud Platform dashboard to verify the device's online status.